Private Cloud Deployment documentation
Profile
One-click installation makes Lanying IM Proprietary Cloud worry-free and efficient. With Private Cloud, you can complete control over your data and services, and access to all services unlimitedly.
With cutting-edge container technology, all Lanying IM services have completed Cloud-native transformation, commit to smooth, stable and reliable operation of bare-metal servers, private cloud platforms, and other on-premise container platforms.
Lanying IM Private Deployment provides two deployment modes: Single server version and cluster version. 3 operates, 10 minutes to setup, the Console provides a concise state monitoring page for controlling system running state in real-time.
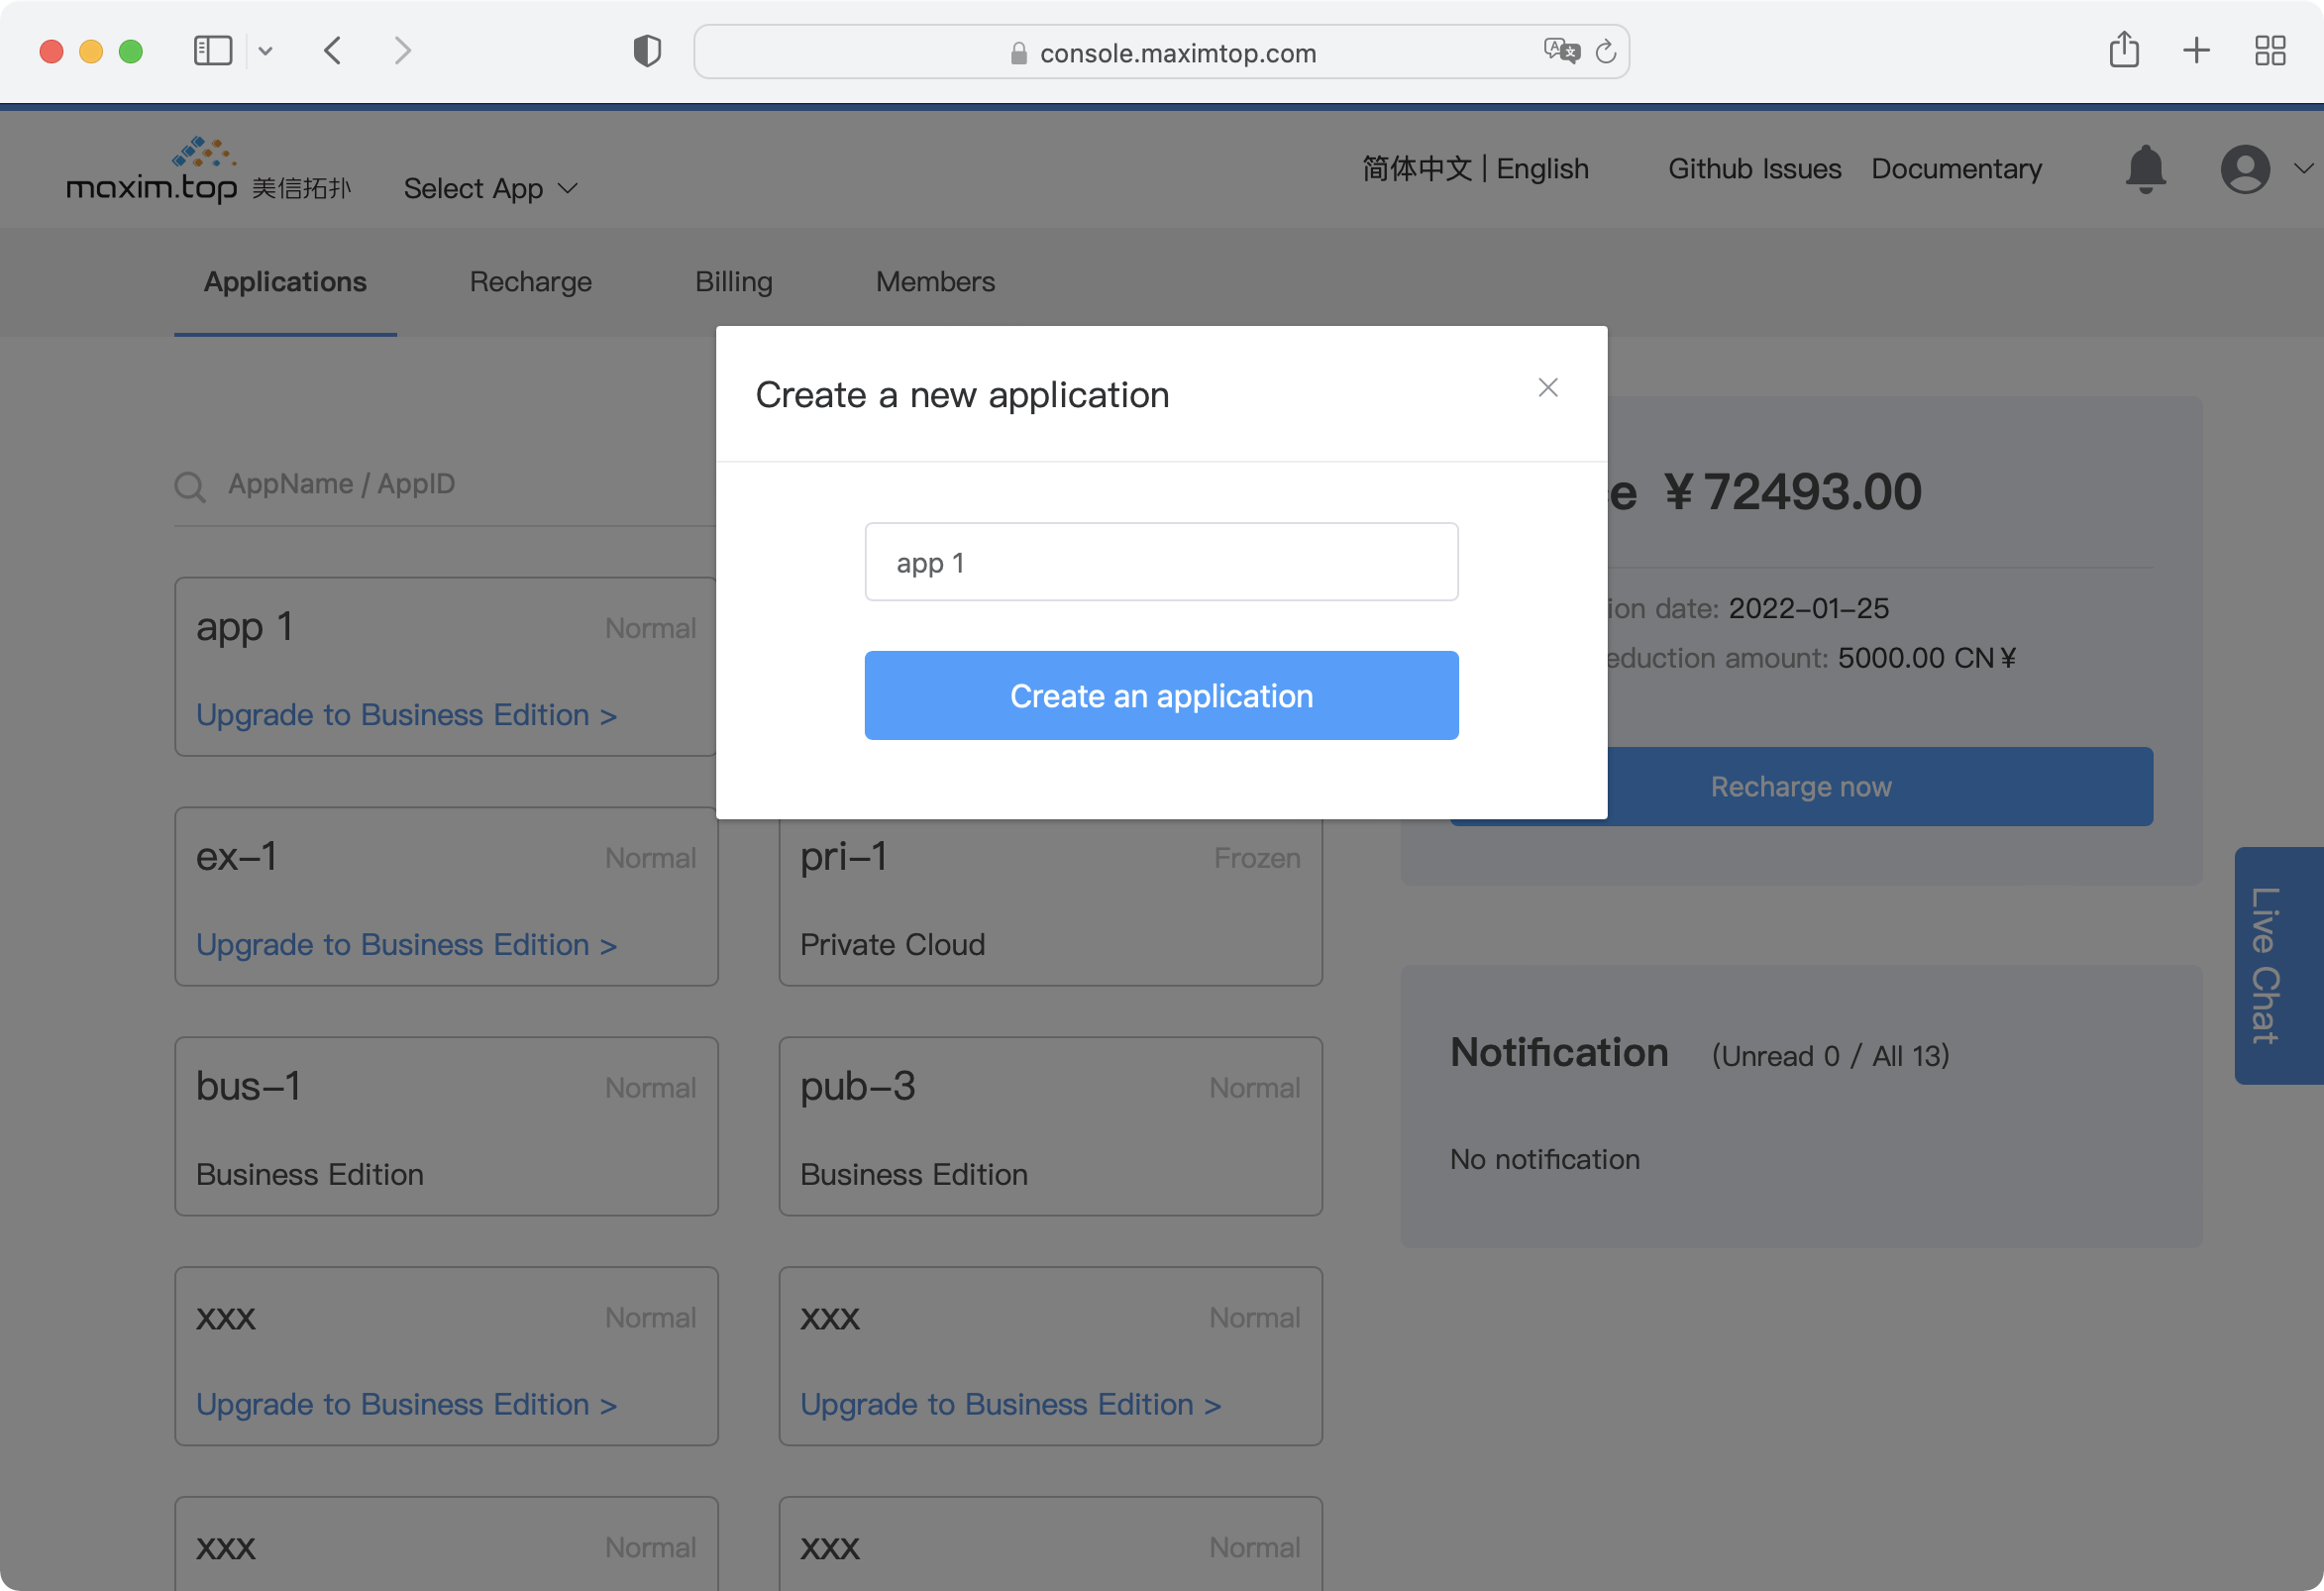
Create application
Login Console Click to create application. Your application will use Free Edition package by default, or can be upgraded to Business Edition.
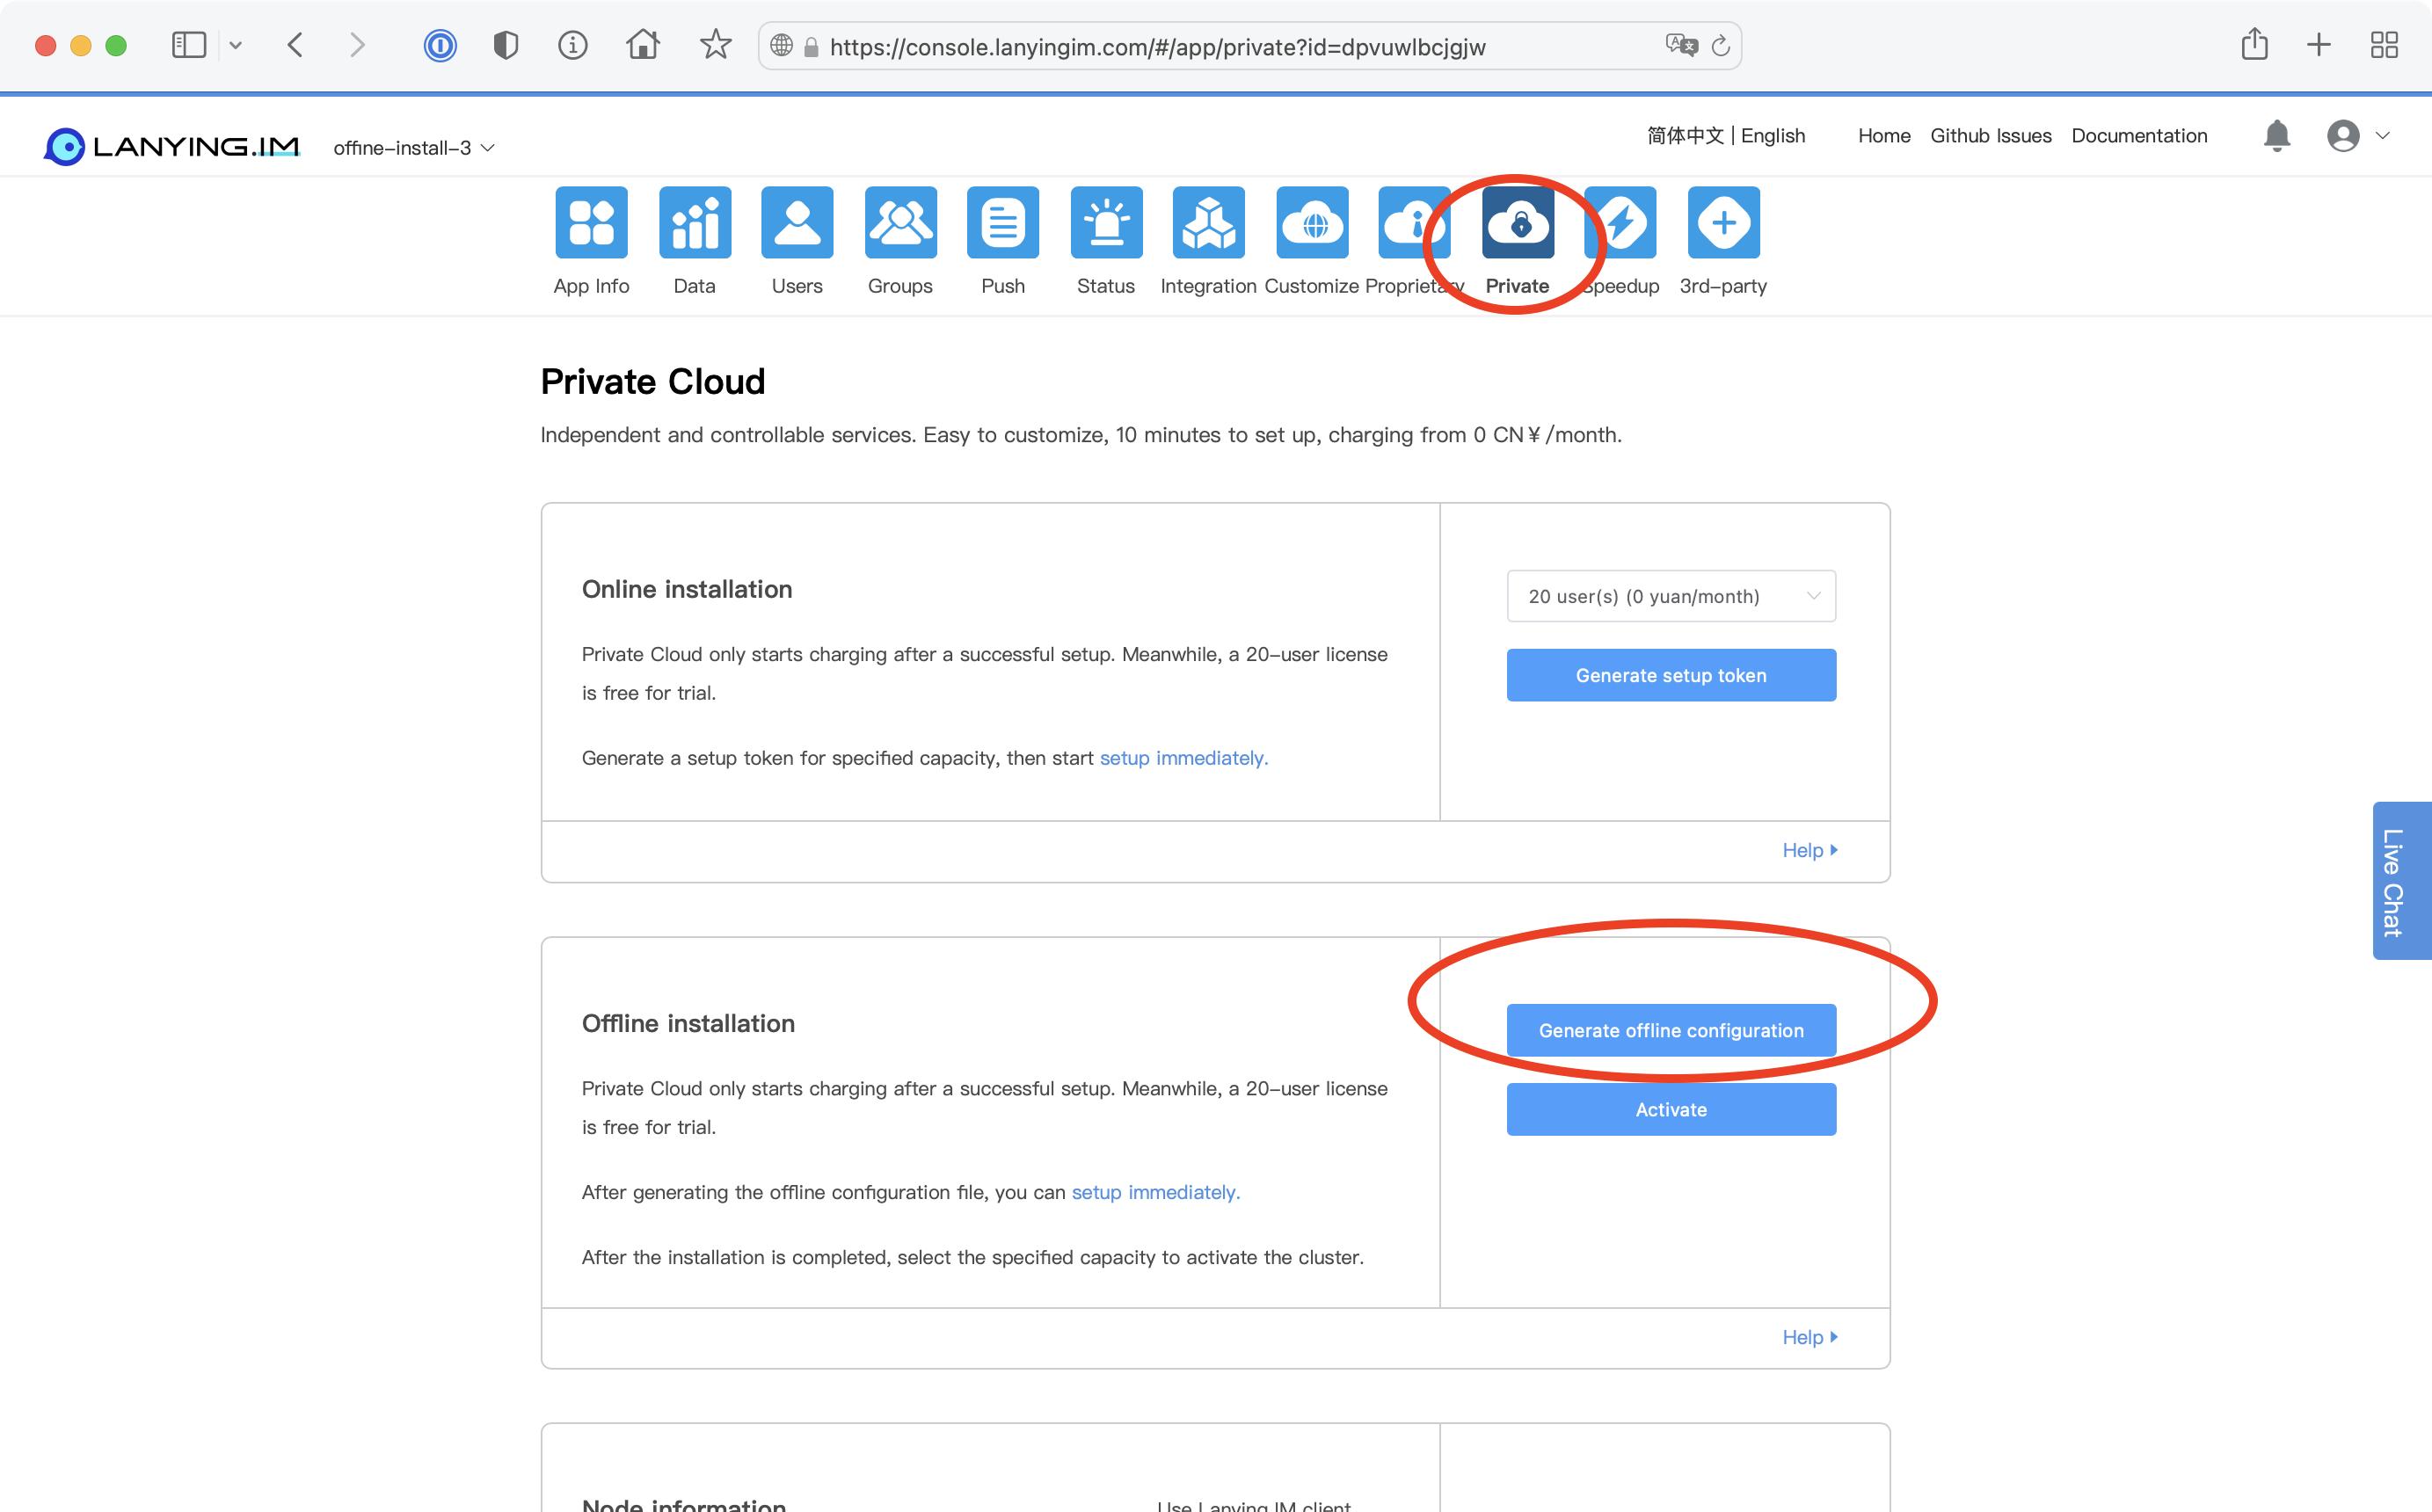
Enable Private Cloud Services
- After application created, go to Application Details page.
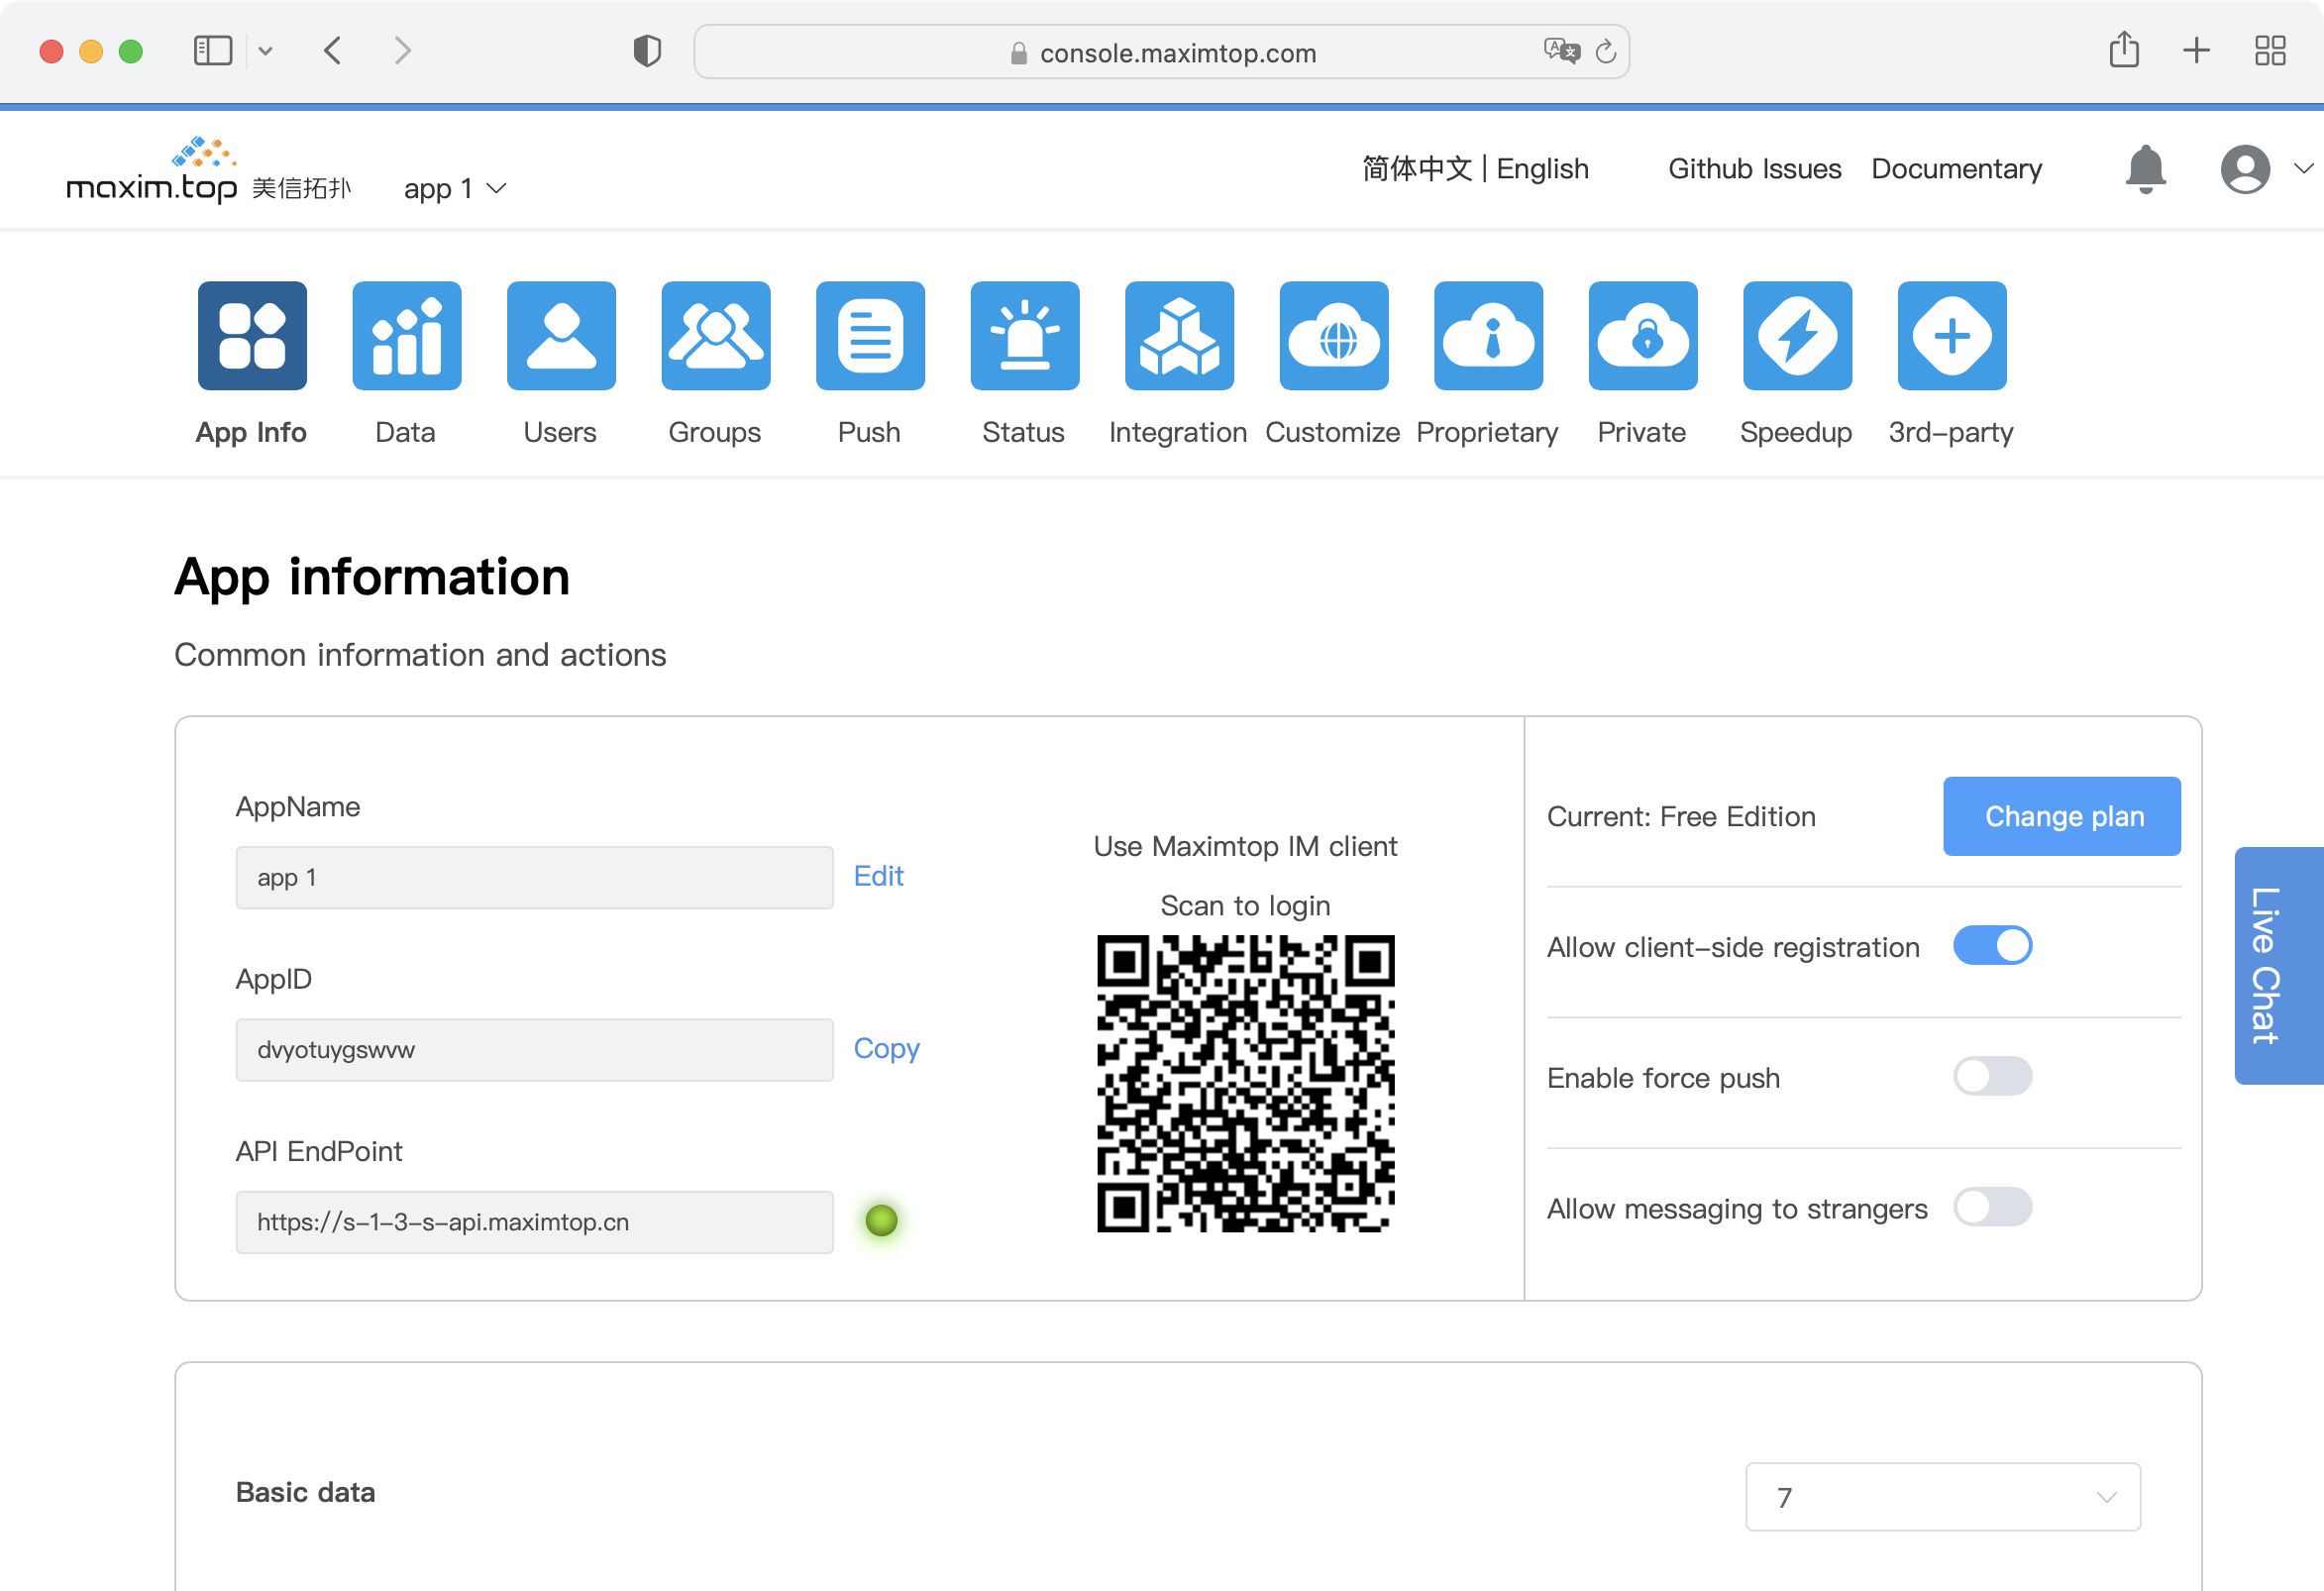
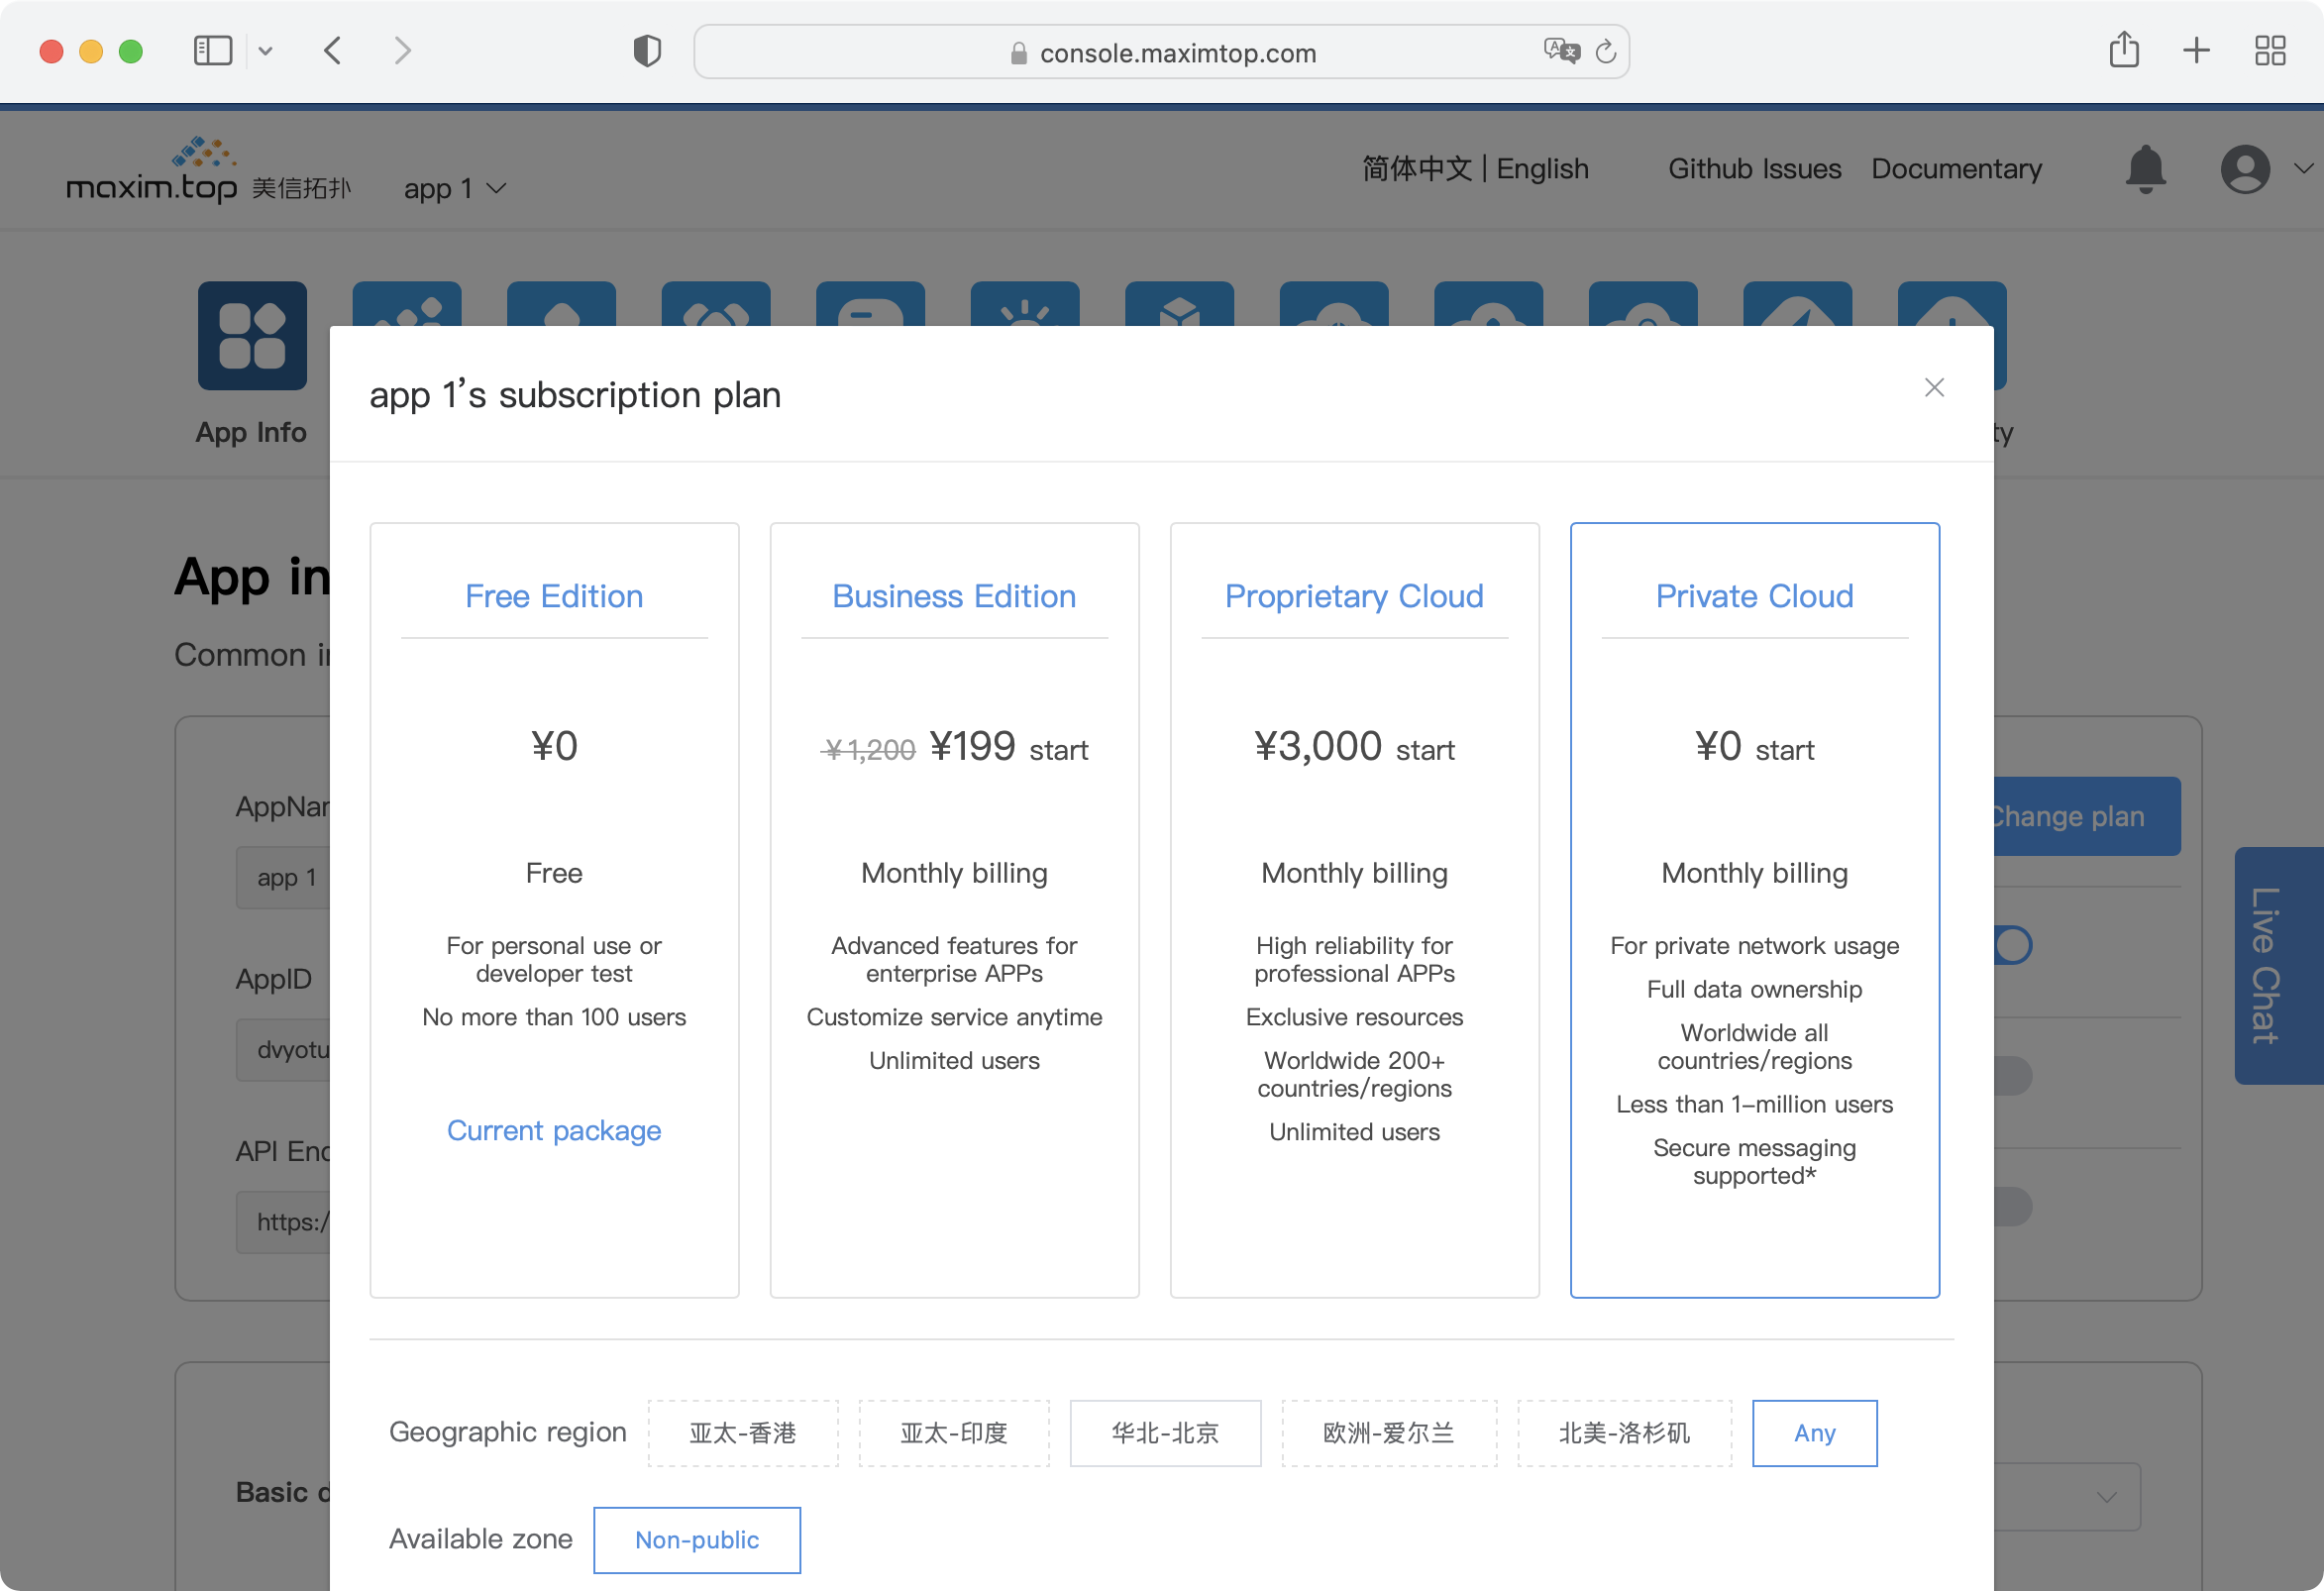
- Click to change plan, select Private Cloud and then “Continue”.
- Click the Private Cloud icon, go to the Private Cloud Details page, download installation package maxim.ctl
$ wget https://package.lanyingim.com/linux/amd64/maxim.ctl
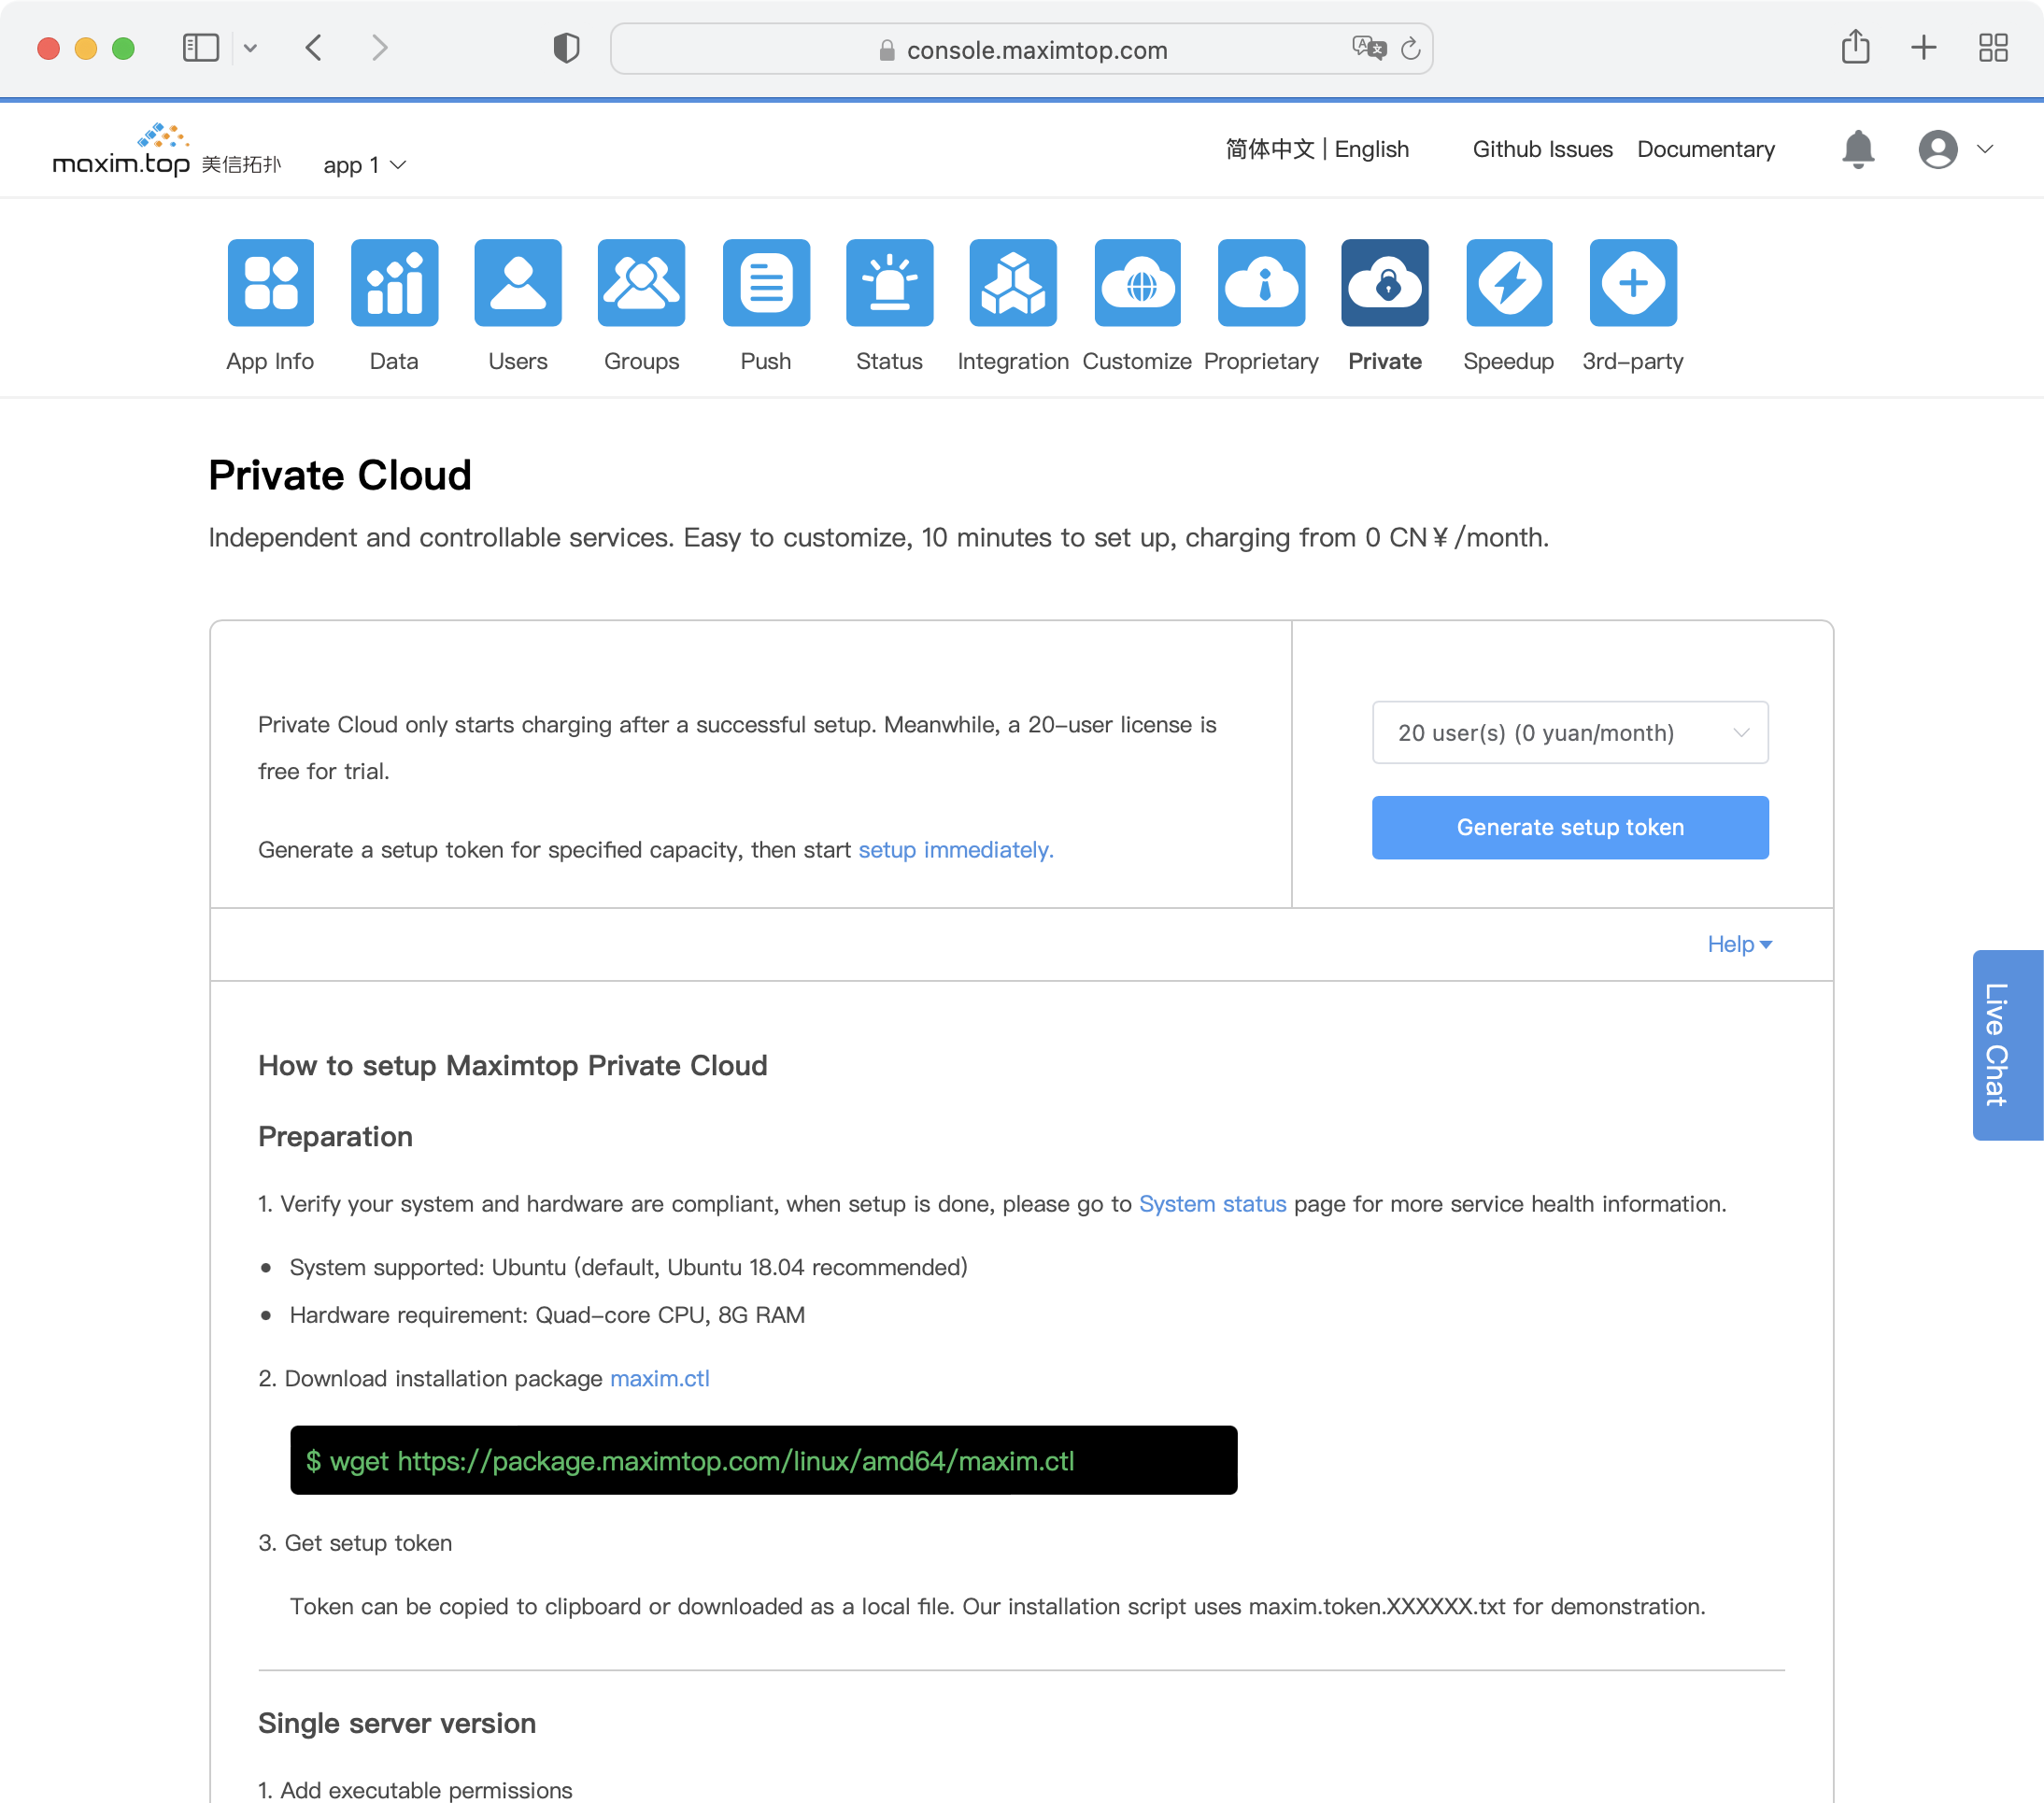
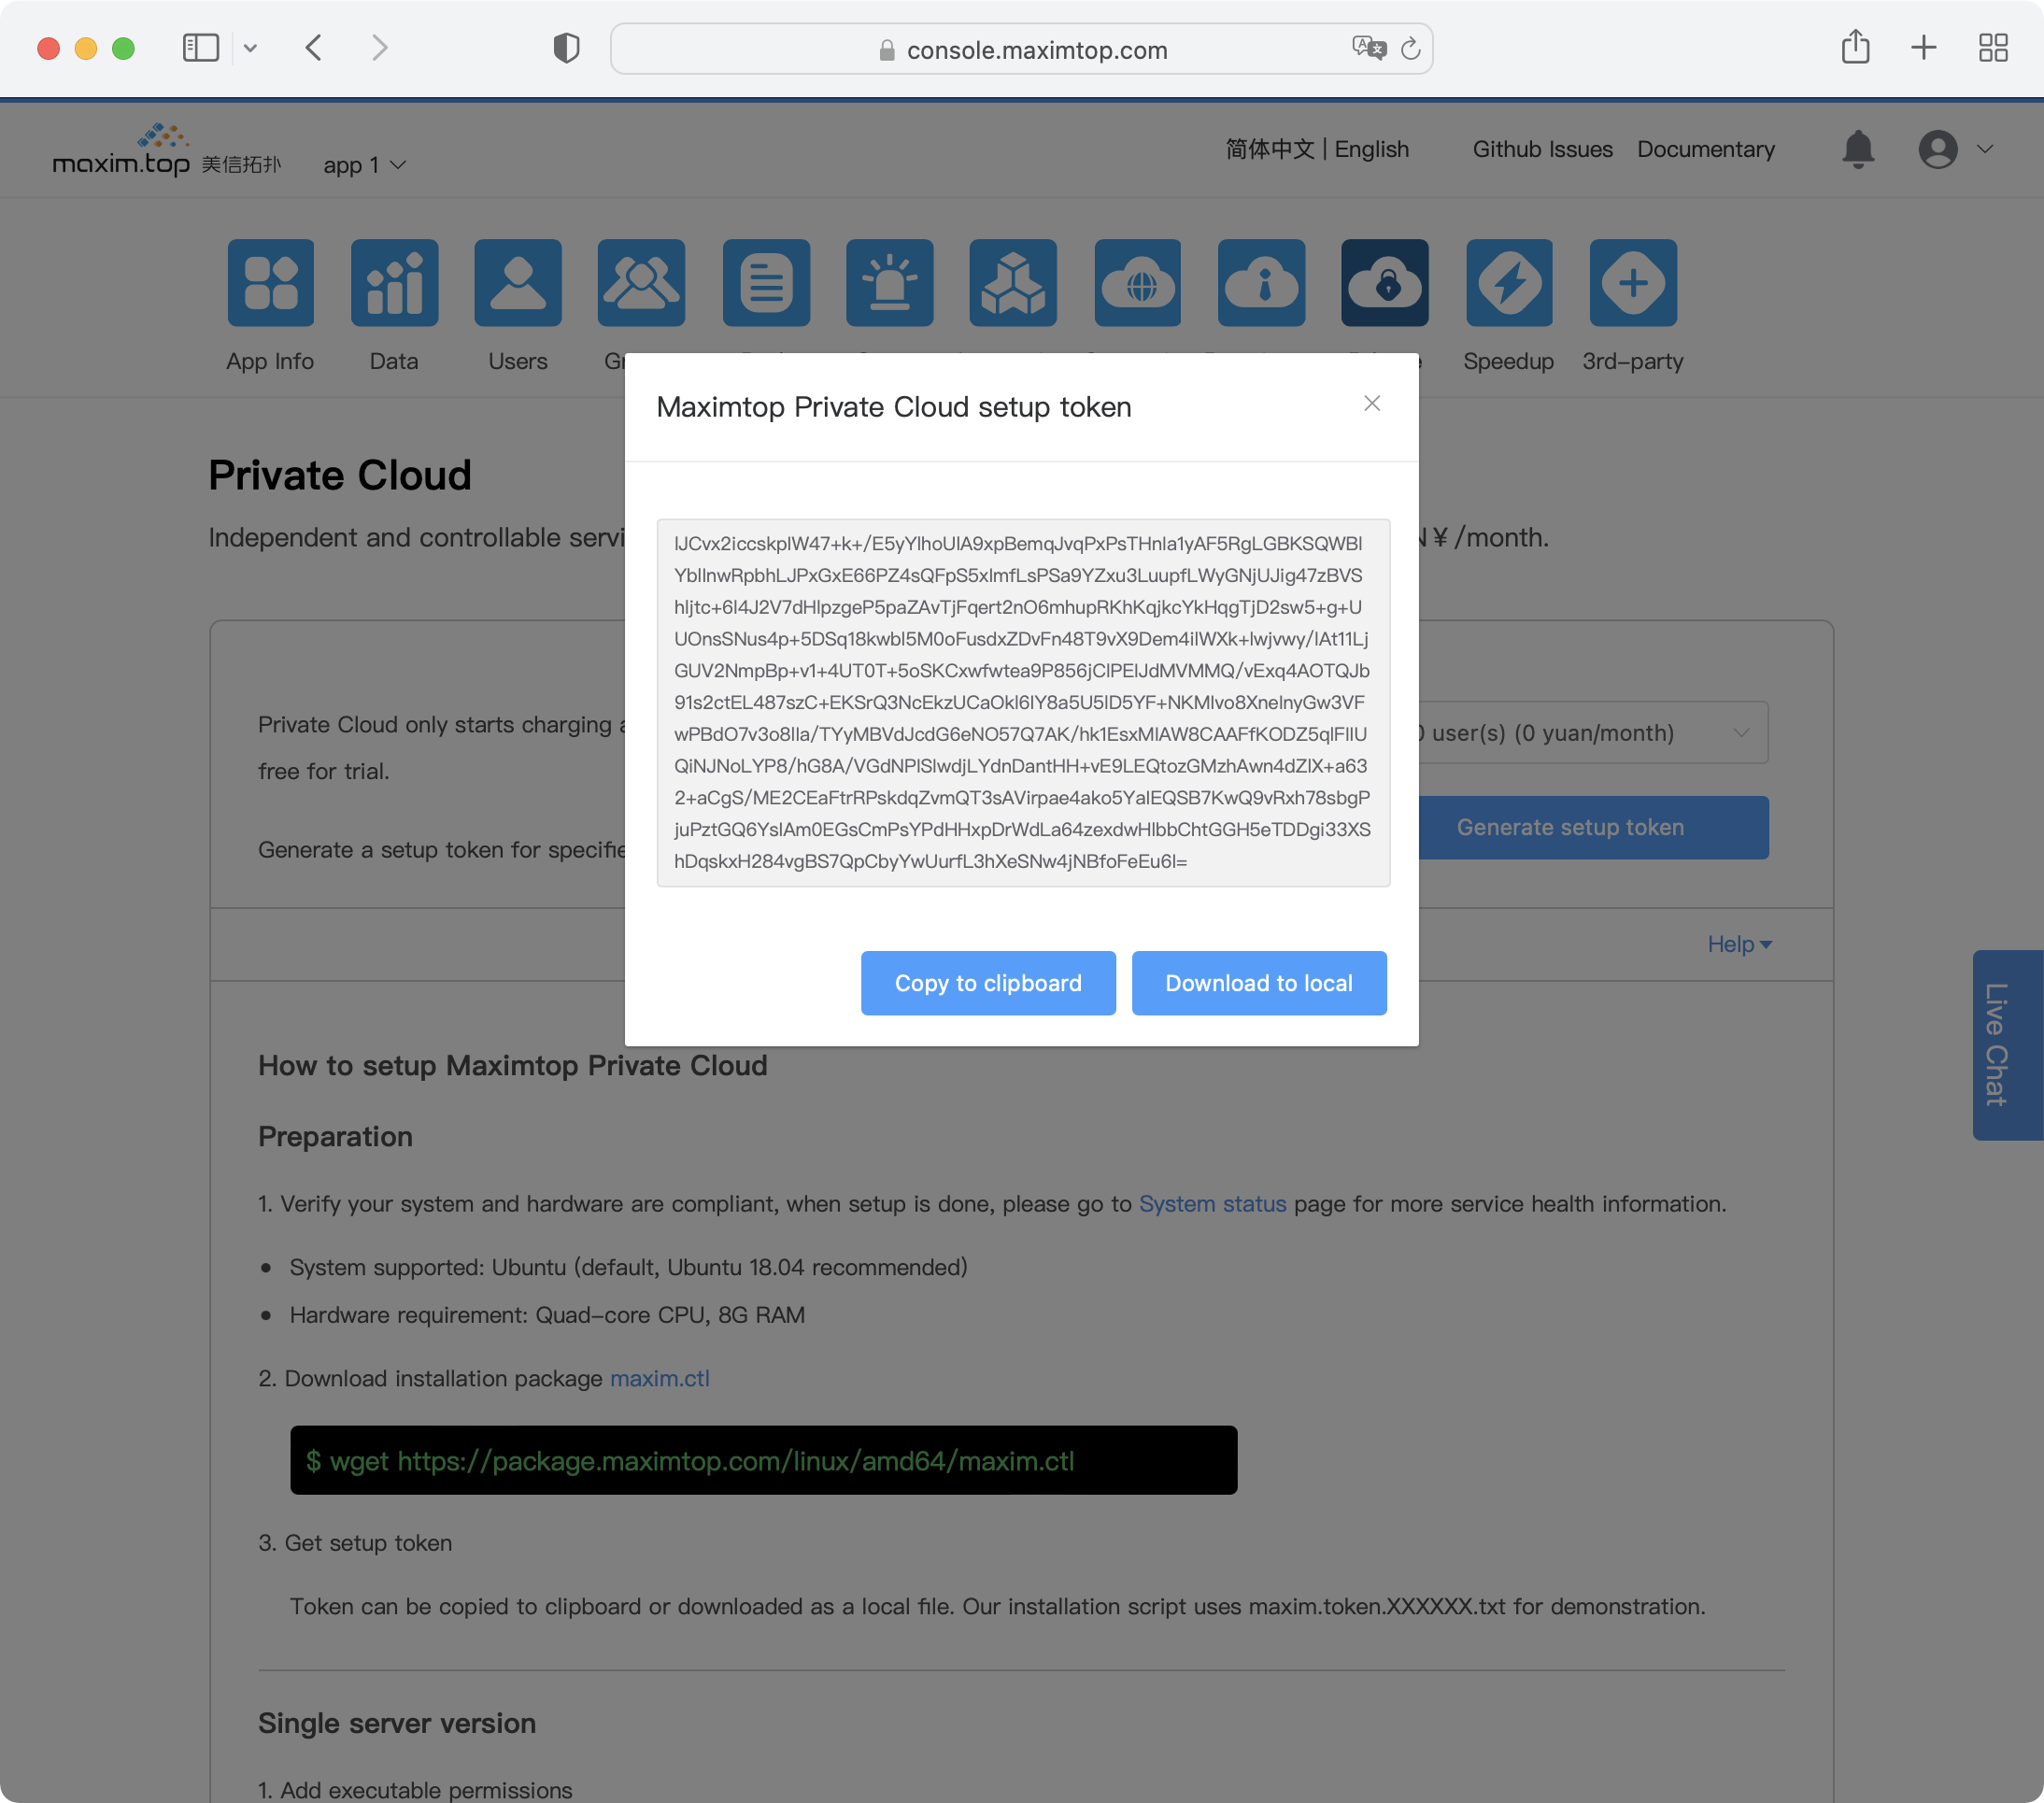
- Get the installation token, which can be copied to clipboard or downloaded as a local file for later use. In the installation script, we use maxim.token.XXXXXXX.txt to demonstrate.
Setup Private Cloud
Installation prerequisites
- OS:
Linux: Ubuntu 24.04
Raspberry Pie: Ubuntu 18.04 rasp3 recommended
MacOS: Catalina 10.15 recommended
- Hardware configuration:
Quad-core CPU, 8 G RAM, 100 G hard disk
3 or more servers required if you choose to install Cluster version
The installation methods are divided into online installation and offline installation. Offline installation does not require access to the internet. It is suitable for installation on servers without internet, but the license needs to be activated once a month. Now only Ubuntu 18.04 is supported.
Single server version
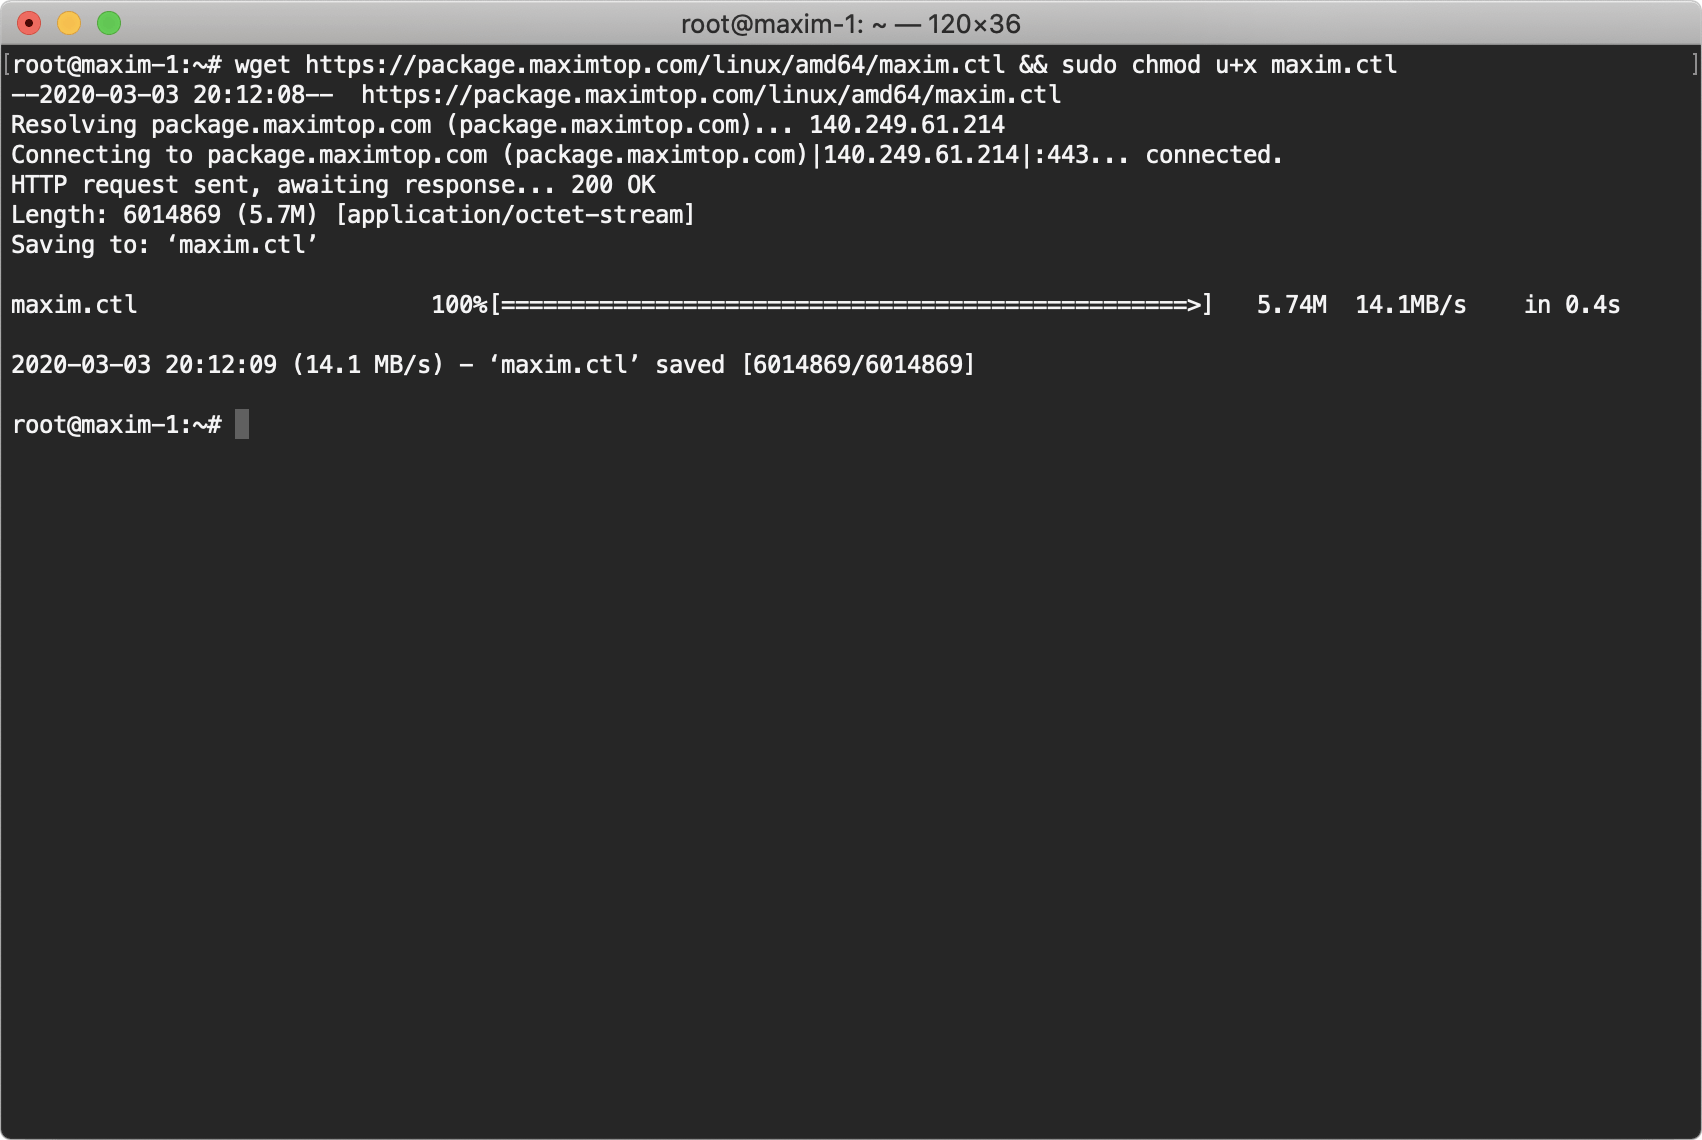
1.First, get a server ready for Private Deployment and log ssh on to it. Then, execute the download installation script command and elevate the executable permissions. The command is as follows:
wget https://package.lanyingim.com/linux/amd64/maxim.ctl && sudo chmod u+x maxim.ctl
Screenshot of execution result:

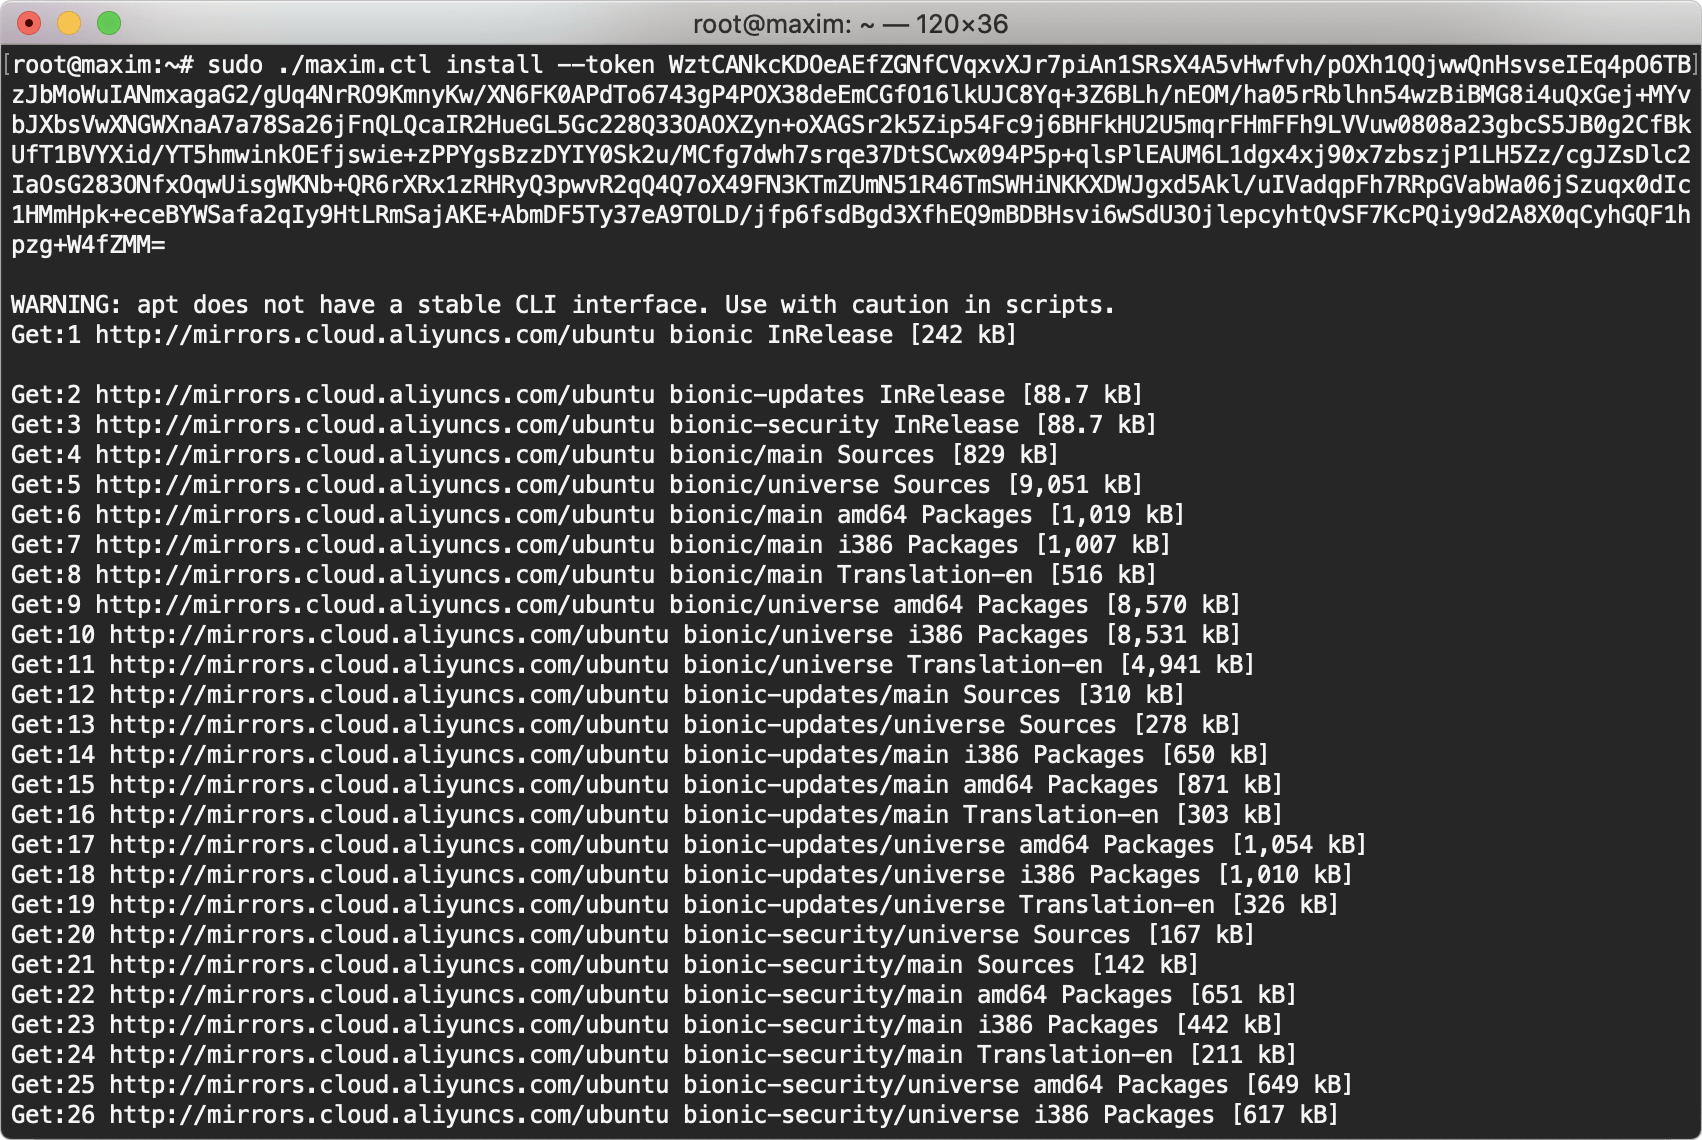
2.Run installation
- Ensure your server to install on has a public network IP, and execute the following command to start.
sudo ./maxim.ctl install --token INSTALL_TOKEN
Note: “Enter maxim install token” hint, means please enter your copied installation token to continue.
Screenshot of execution started:
Screenshot of installation completed

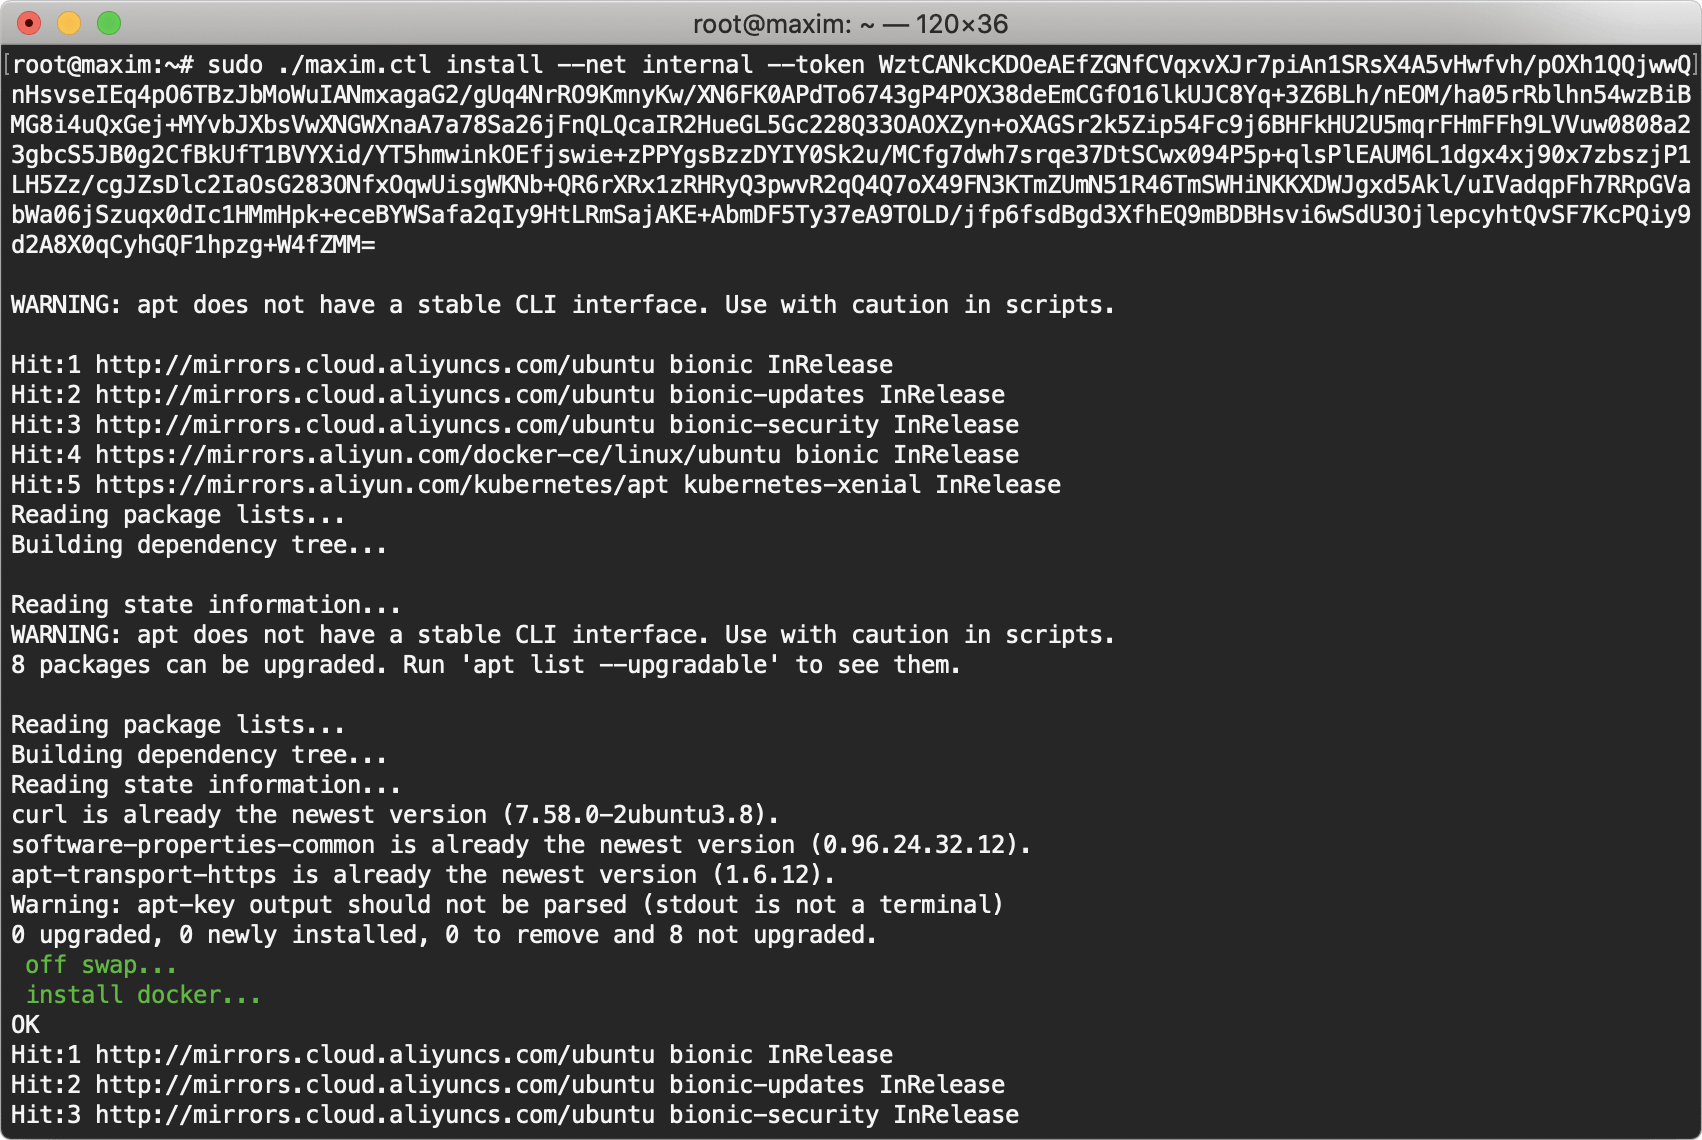
- The local environment is not accessible externally, and the parameter --net internal needs to be added during installation to prompt the installer to select intranet IP registration.
Execute the following command to start installation
sudo ./maxim.ctl install --net internal --token INSTALL_TOKEN
Hint: The installation script hints “Enter maxim install token”, means please enter the copied installation token to continue.
Screenshot of execution started:
Screenshot of installation completed
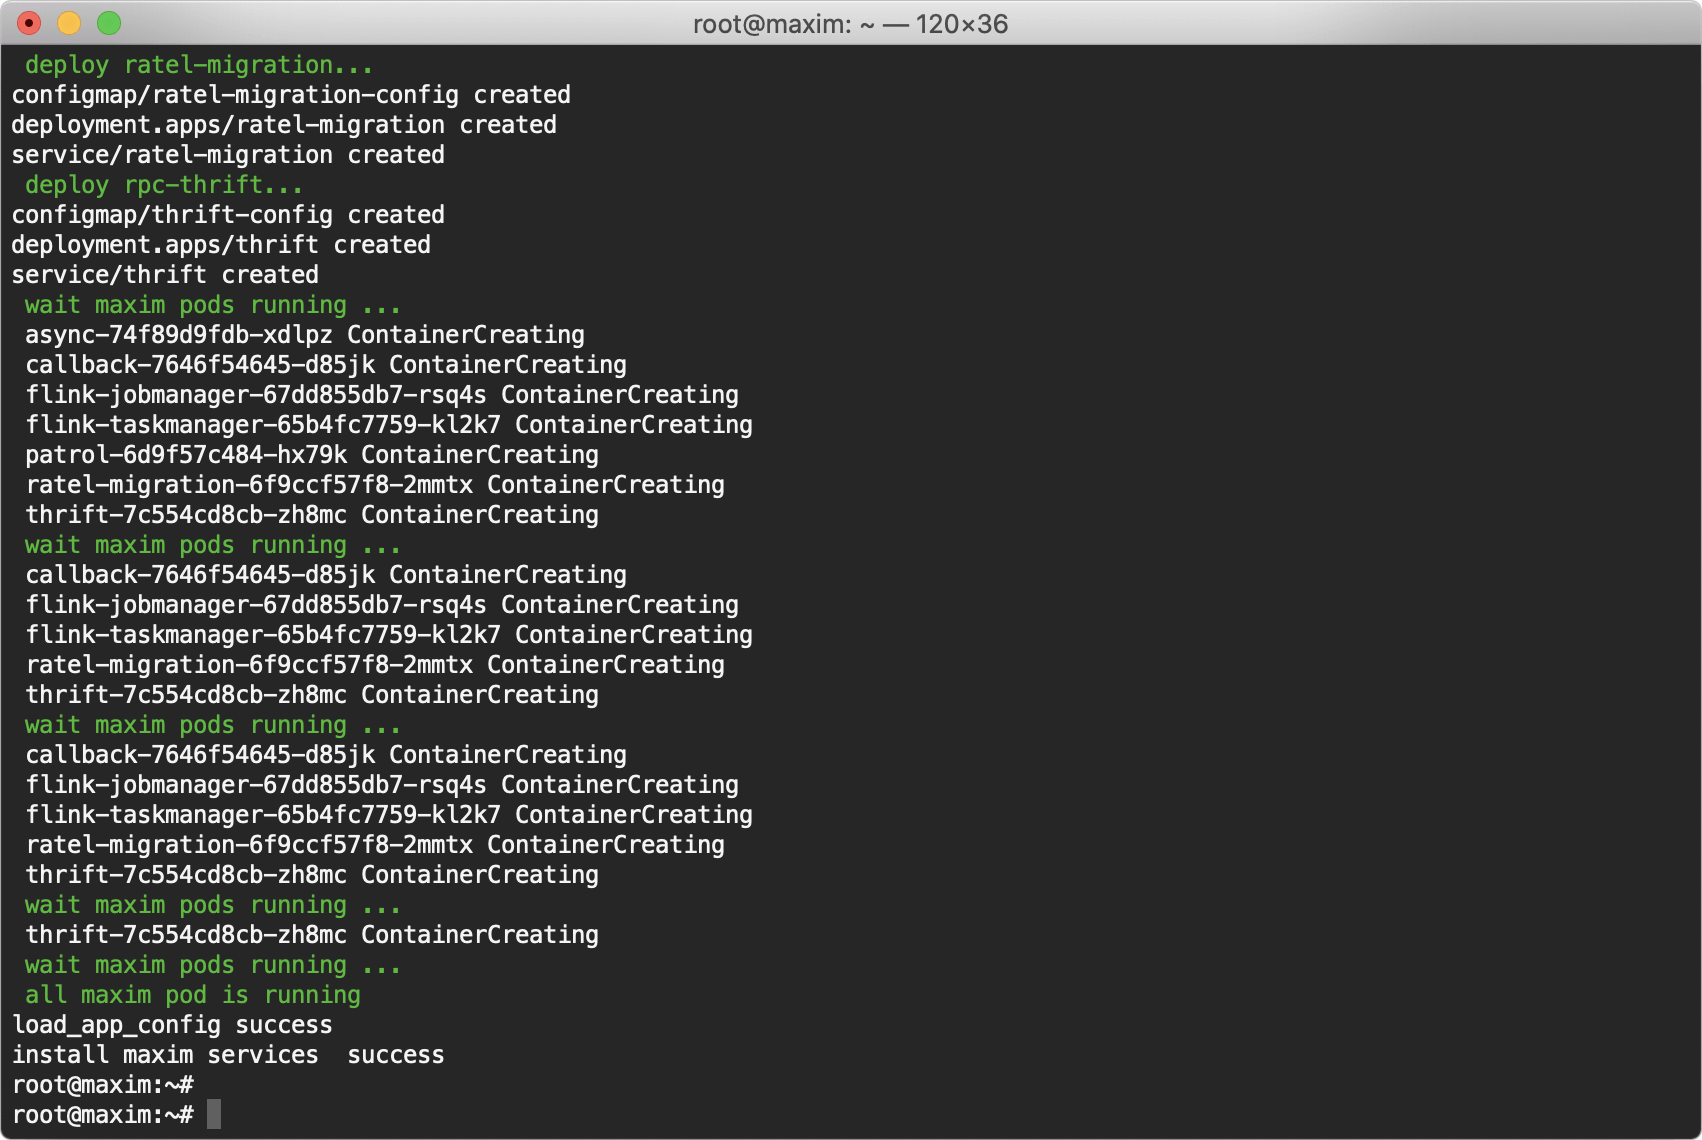
Hint: Wait for the installation to complete, which takes about 15 minutes.
Cluster version
1.Configure cluster access
Configure the ssh permission of the first host to the remaining hosts, taking three hosts, 172.16.0.78, 172.16.0.79, 172.16.0.80 as examples.
ssh login master node (172.16.0.78)
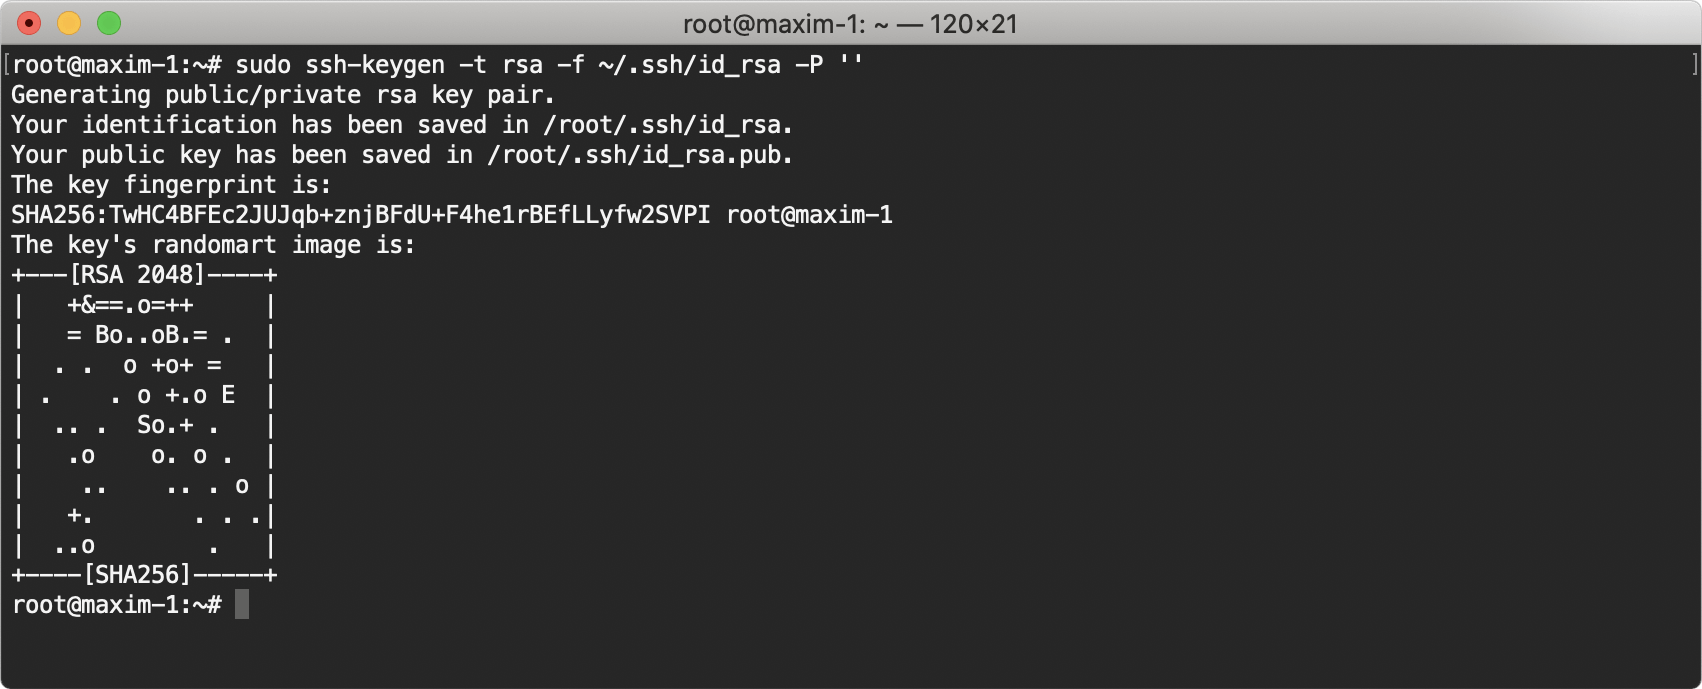
Execute the following command to generate public and private key for ssh:
sudo ssh-keygen -t rsa -f ~/.ssh/id_rsa -P ''
Screenshot of execution result:
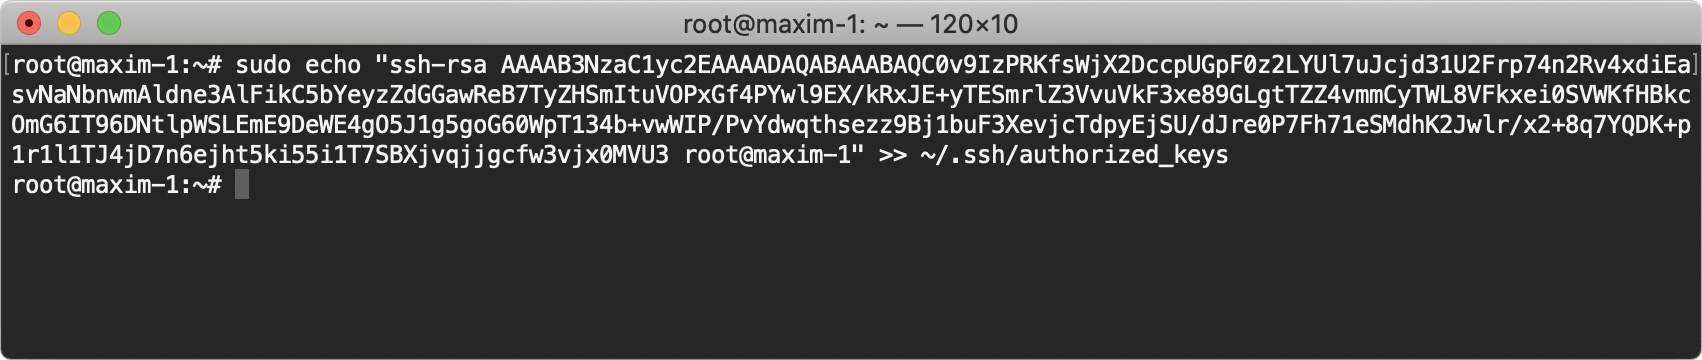
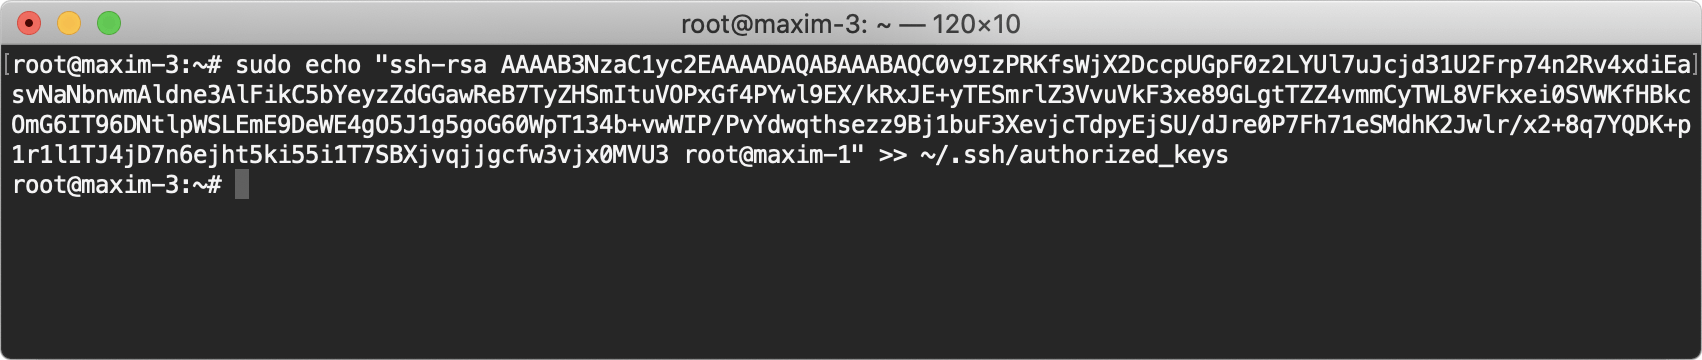
Execute the output of the following commands on hosts 172.16.0.78, 172.16.0.79, 172.16.0.80, respectively
sudo echo "sudo echo \"`cat ~/.ssh/id_rsa.pub`\" >> ~/.ssh/authorized_keys"
Screenshot of command output:

Execution result of the command output at 172.16.0.78:
Execution result of the command output at 172.16.0.79:

Execution result of the command output at 172.16.0.80:
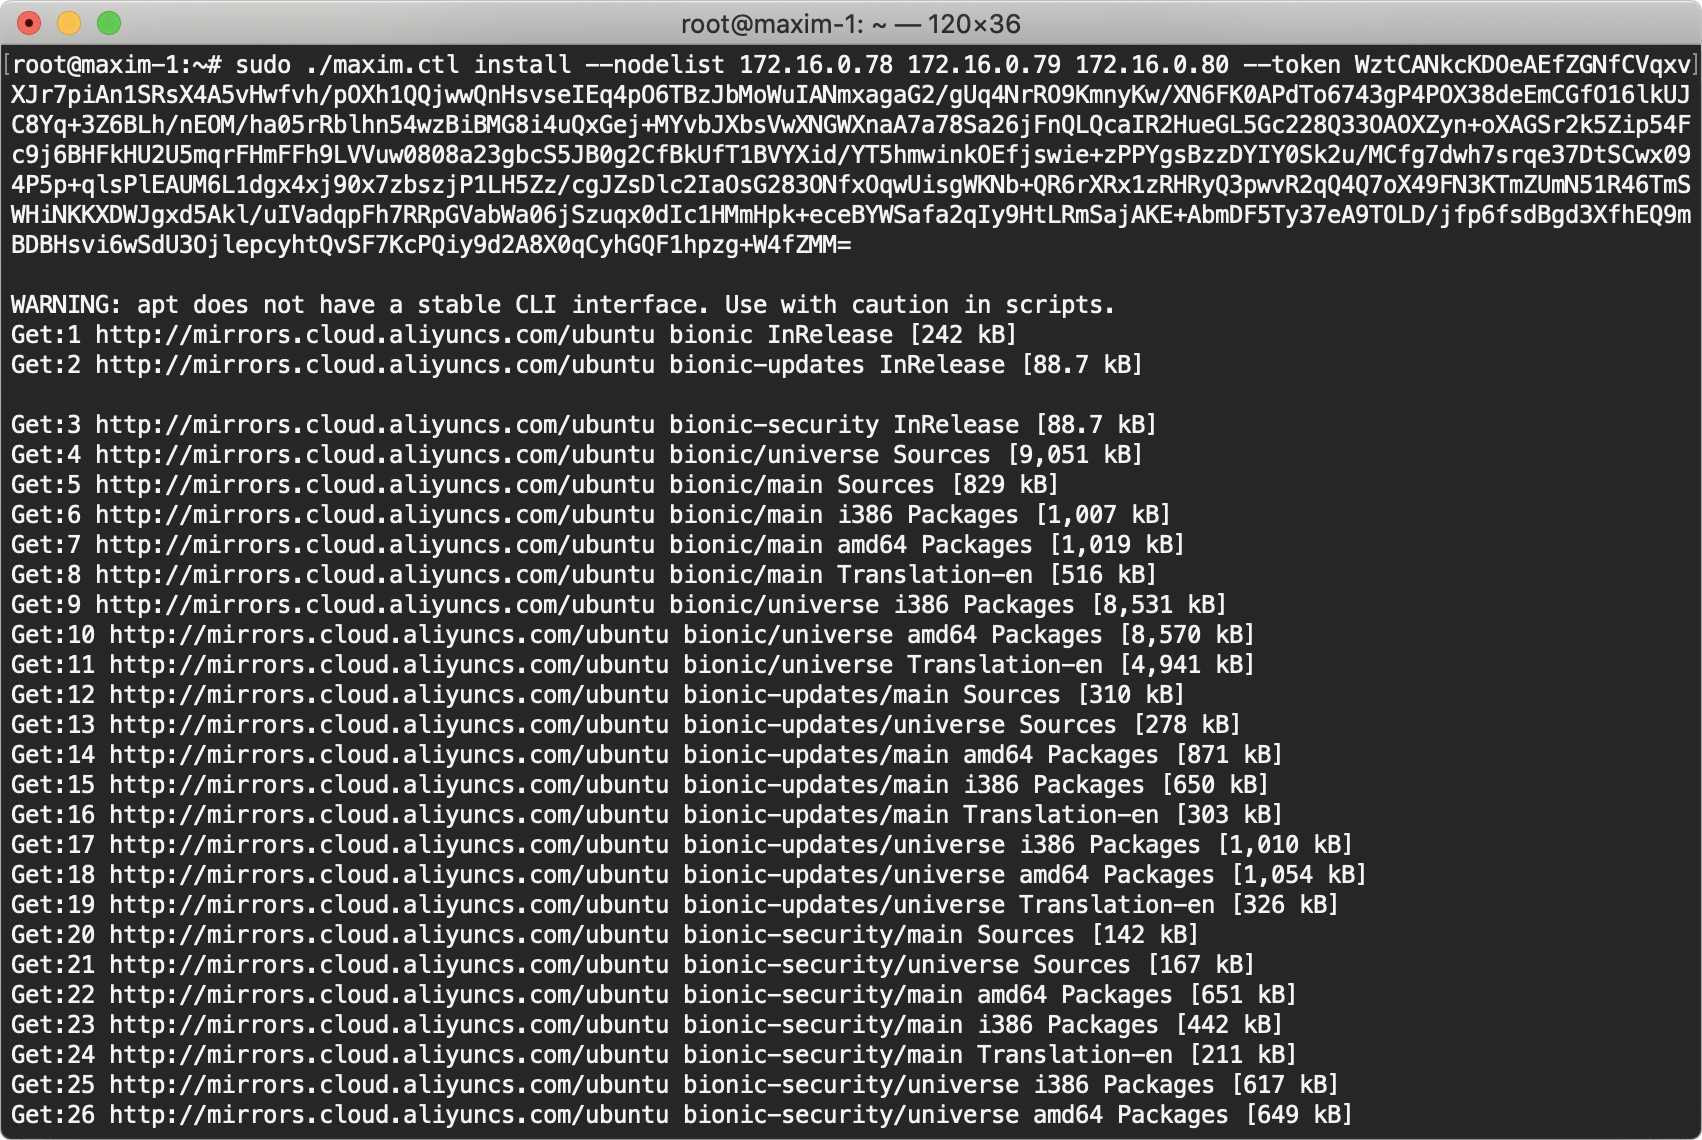
2.ssh login on to the first host 172.16.0.78, execute the following command to download installation script and elevate executable permission:
wget https://package.lanyingim.com/linux/amd64/maxim.ctl && sudo chmod u+x maxim.ctl
Screenshot of execution result:
- Ensure the sever has a public network IP, execute the following command to start.
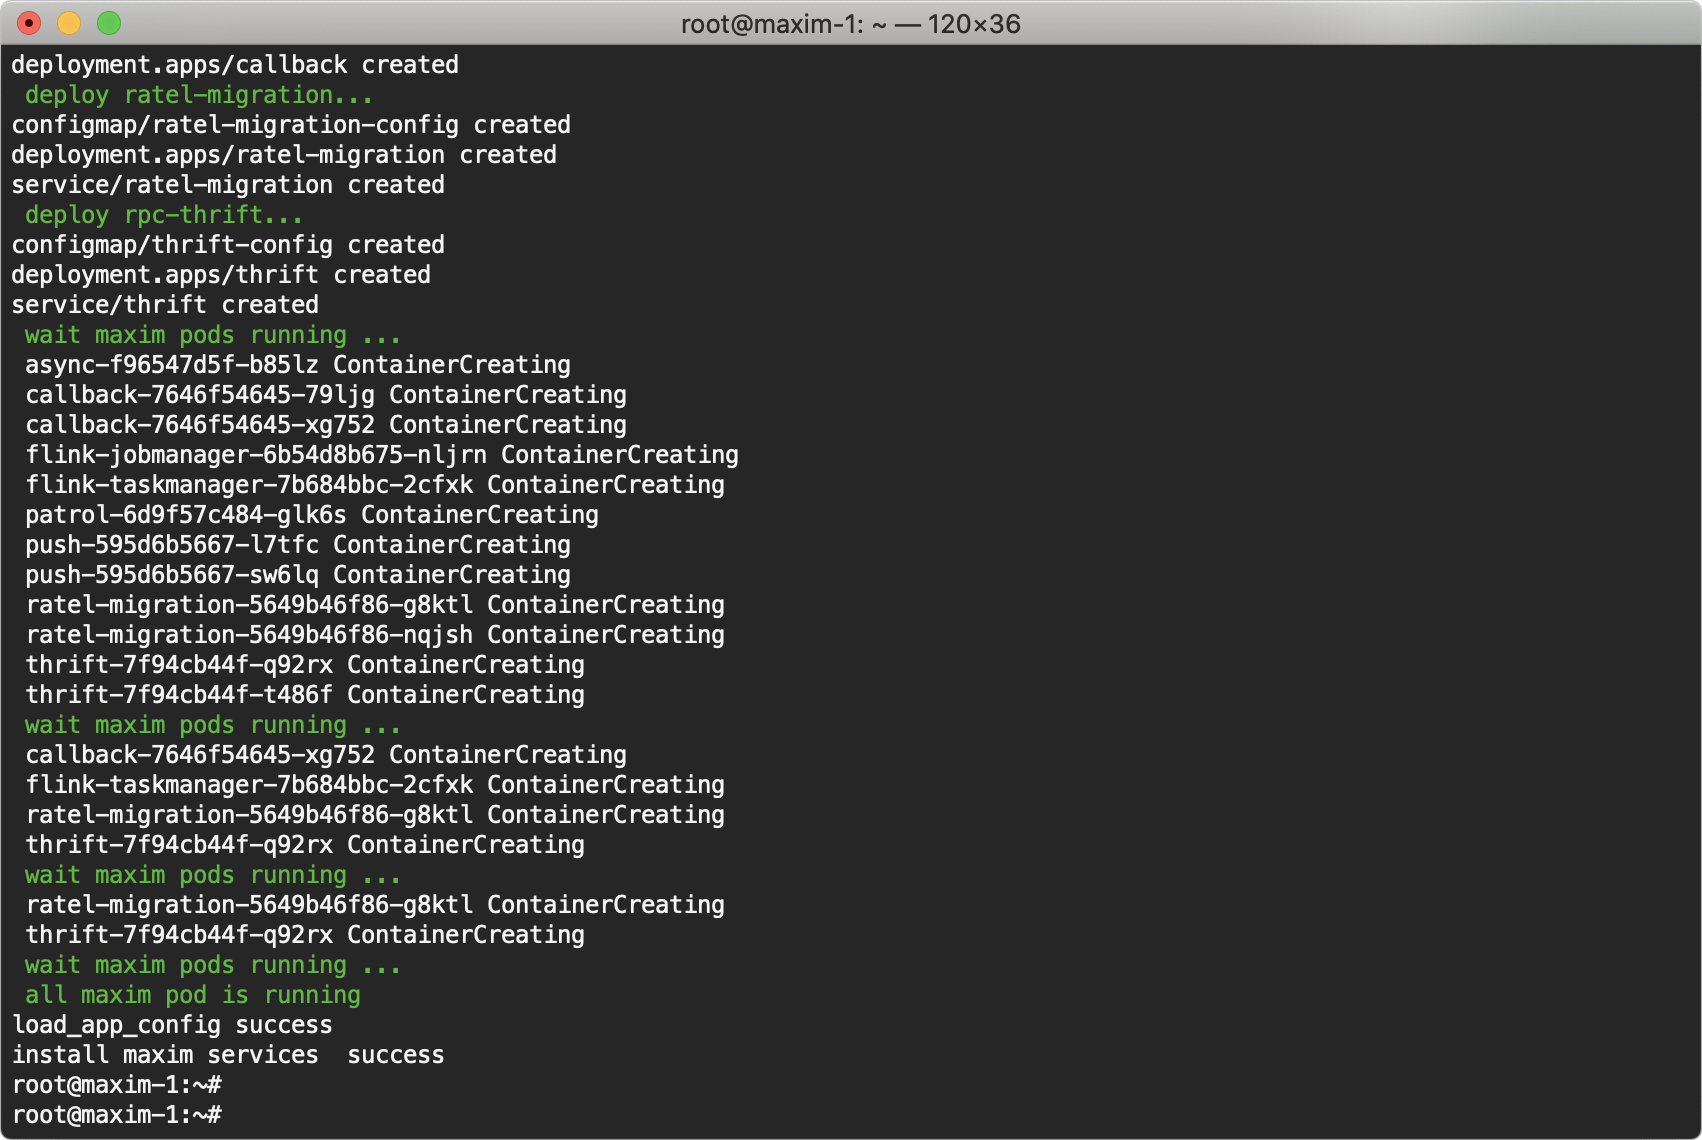
sudo ./maxim.ctl install --nodelist 172.16.0.78 172.16.0.79 172.16.0.80 --token INSTALL_TOKEN
Hint: The installation script hints “Enter maxim install token”, means please enter the copied installation token to continue.
Screenshot of execution started:
Screenshot of installation completed
- The local environment is not accessible externally, and the parameter --net internal needs to be added during installation to prompt the installer to select intranet IP registration.
Execute the following command to install.
sudo ./maxim.ctl install --nodelist 172.16.0.78 172.16.0.79 172.16.0.80 --net internal --token INSTALL_TOKEN
Hint: The installation script hints “Enter maxim install token”, means please enter the copied installation token to continue.
Screenshot of execution started:

Screenshot of installation completed

Hint: Wait for the installation to complete, which takes about 20 minutes.
Alibaba Cloud version
Single server version and Cluster version support using Alibaba Cloud's redis/rds/kafka/oss,please execute the following command before Single server version and Cluster versions's "Step 2: install" as needs:
- Use Alibaba Cloud's redis as Storage
## redis-server is redis' service Address, redis-password is redis' Password
sudo ./maxim.ctl set_config --config redis-server=r-xxx.redis.rds.aliyuncs.com:6379 redis-password=xxx
- Use Alibaba Cloud redis as cache
## redis-cache-server为redis的服务Address, redis-cache-password为redis的Password
sudo ./maxim.ctl set_config --config redis-cache-server=r-xxx.redis.rds.aliyuncs.com:6379 redis-cache-password=xxx
- Use Alibaba Cloud rds
## mysql-server is rds' service Address, mysql-username is rds' Username, mysql-password is rds' Password
sudo ./maxim.ctl set_config --config mysql-server=rm-xxx.mysql.rds.aliyuncs.com:3306 mysql-username=xxx mysql-password=xxx
- Use Alibaba Cloud kafka
## kafka-server is kafka's Address,kafka-user is kafka's Username, kafka-password is kafka's Password
sudo ./maxim.ctl set_config --config kafka-server=172.16.1.10:9092,172.16.1.9:9092,172.16.1.11:9092 kafka-user=xxx kafka-password=xxx
- Use Alibaba Cloud oss
## file-storage-access-key-id is Alibaba Cloud sub-account ID
## file-storage-access-key-secret Alibaba Cloud sub-account Password
## file-storage-access-endpoint is Alibaba Cloud access point Address
## file-storage-bucket-chat-file is Alibaba Cloud OSS's bucket name
## file-storage-bucket-user-profile is Alibaba Cloud OSS's bucket name
## file-storage-bucket-chat-history is Alibaba Cloud OSS's bucket name
## file-storage-bucket-chat-file-chatroom is Alibaba Cloud OSS's bucket name
sudo ./maxim.ctl set_config --config file-storage-type=oss file-storage-access-key-id=xxx file-storage-access-key-secret=xxx file-storage-access-endpoint=oss-cn-beijing.aliyuncs.com file-storage-bucket-chat-file=chat-xxx file-storage-bucket-user-profile=profile-xxx file-storage-bucket-chat-history=history-xxx file-storage-bucket-chat-file-chatroom=chat-file-chatroom-xxx
Single server version (Offline installation)
1.Download Offline Installation Package, and upload it to the server for private deployment.
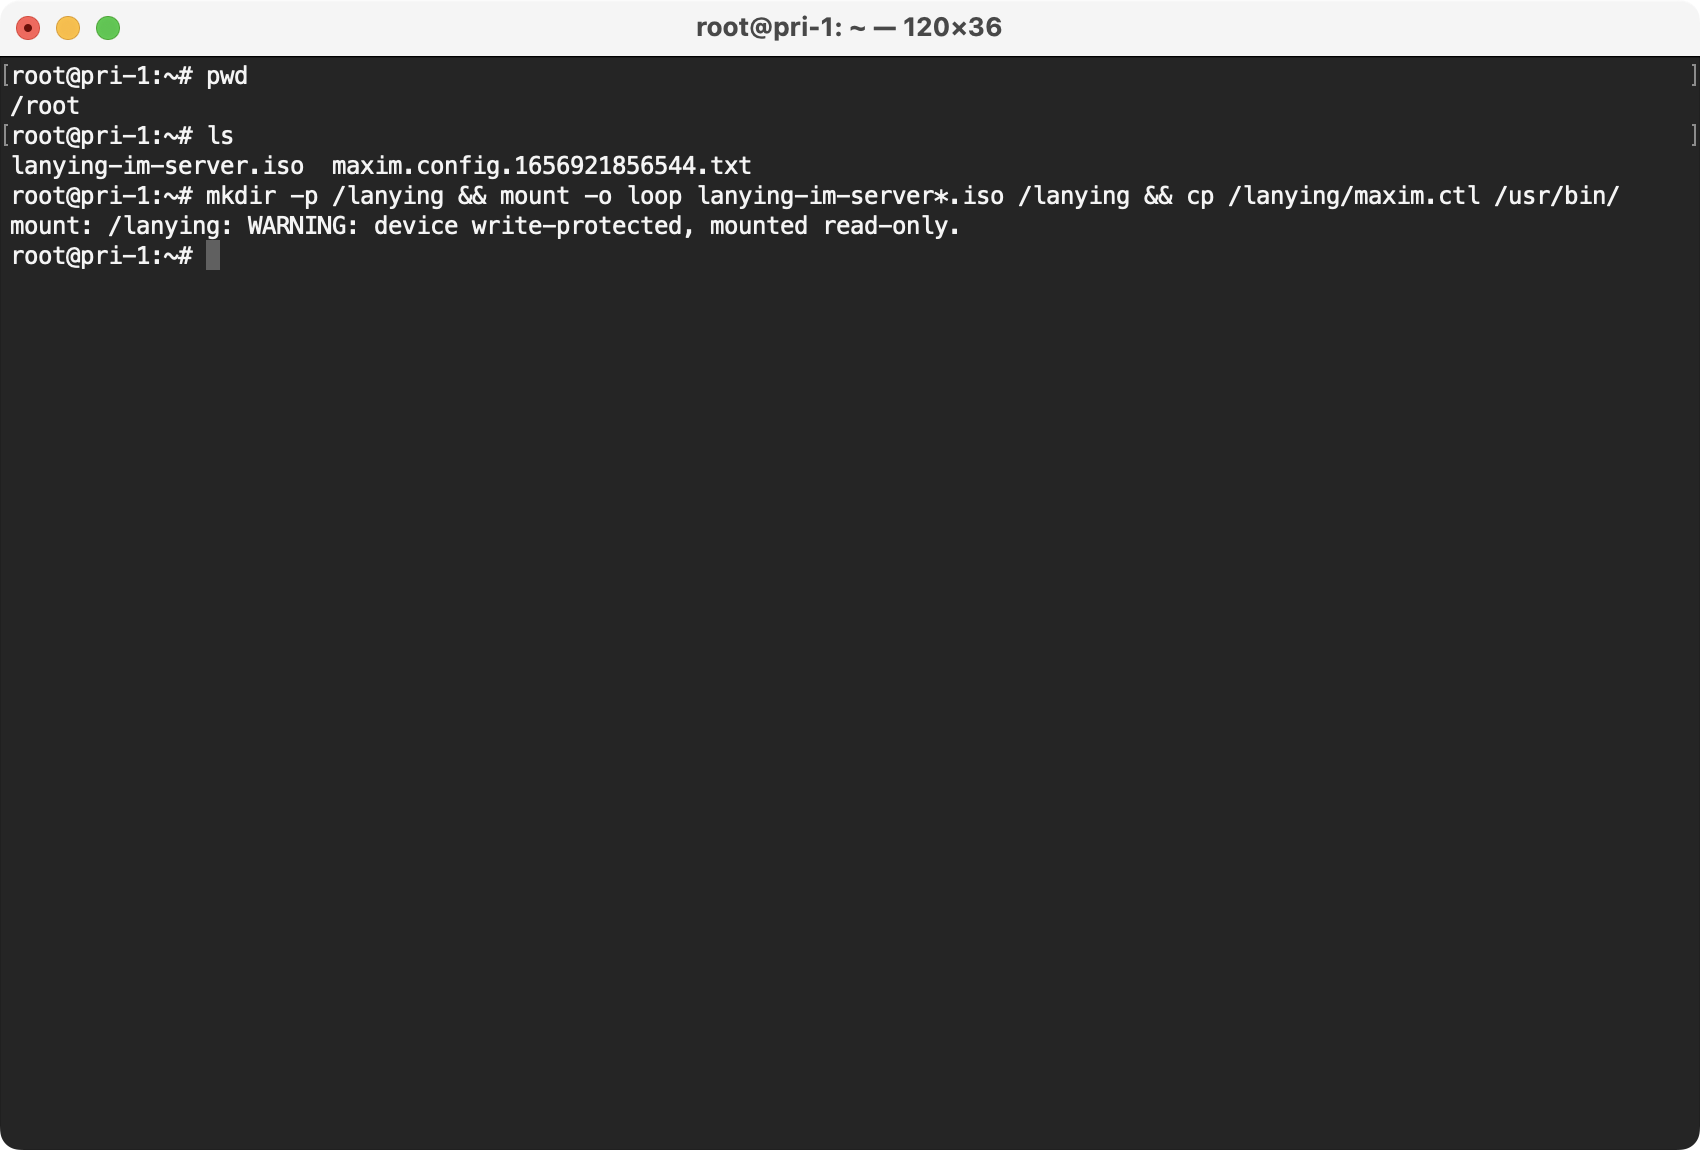
2.Execute the following command to mount the offline installation package and add maxim.ctl to the executable path.
mkdir -p /lanying && mount -o loop lanying-im-server*.iso /lanying && cp /lanying/maxim.ctl /usr/bin/
Screenshot of execution result:
3.Generate offline configuration file
Login Console, select the APP, enter the Private Cloud page, generate an offline configuration file, and upload it to the server.
Screenshot of the operation:
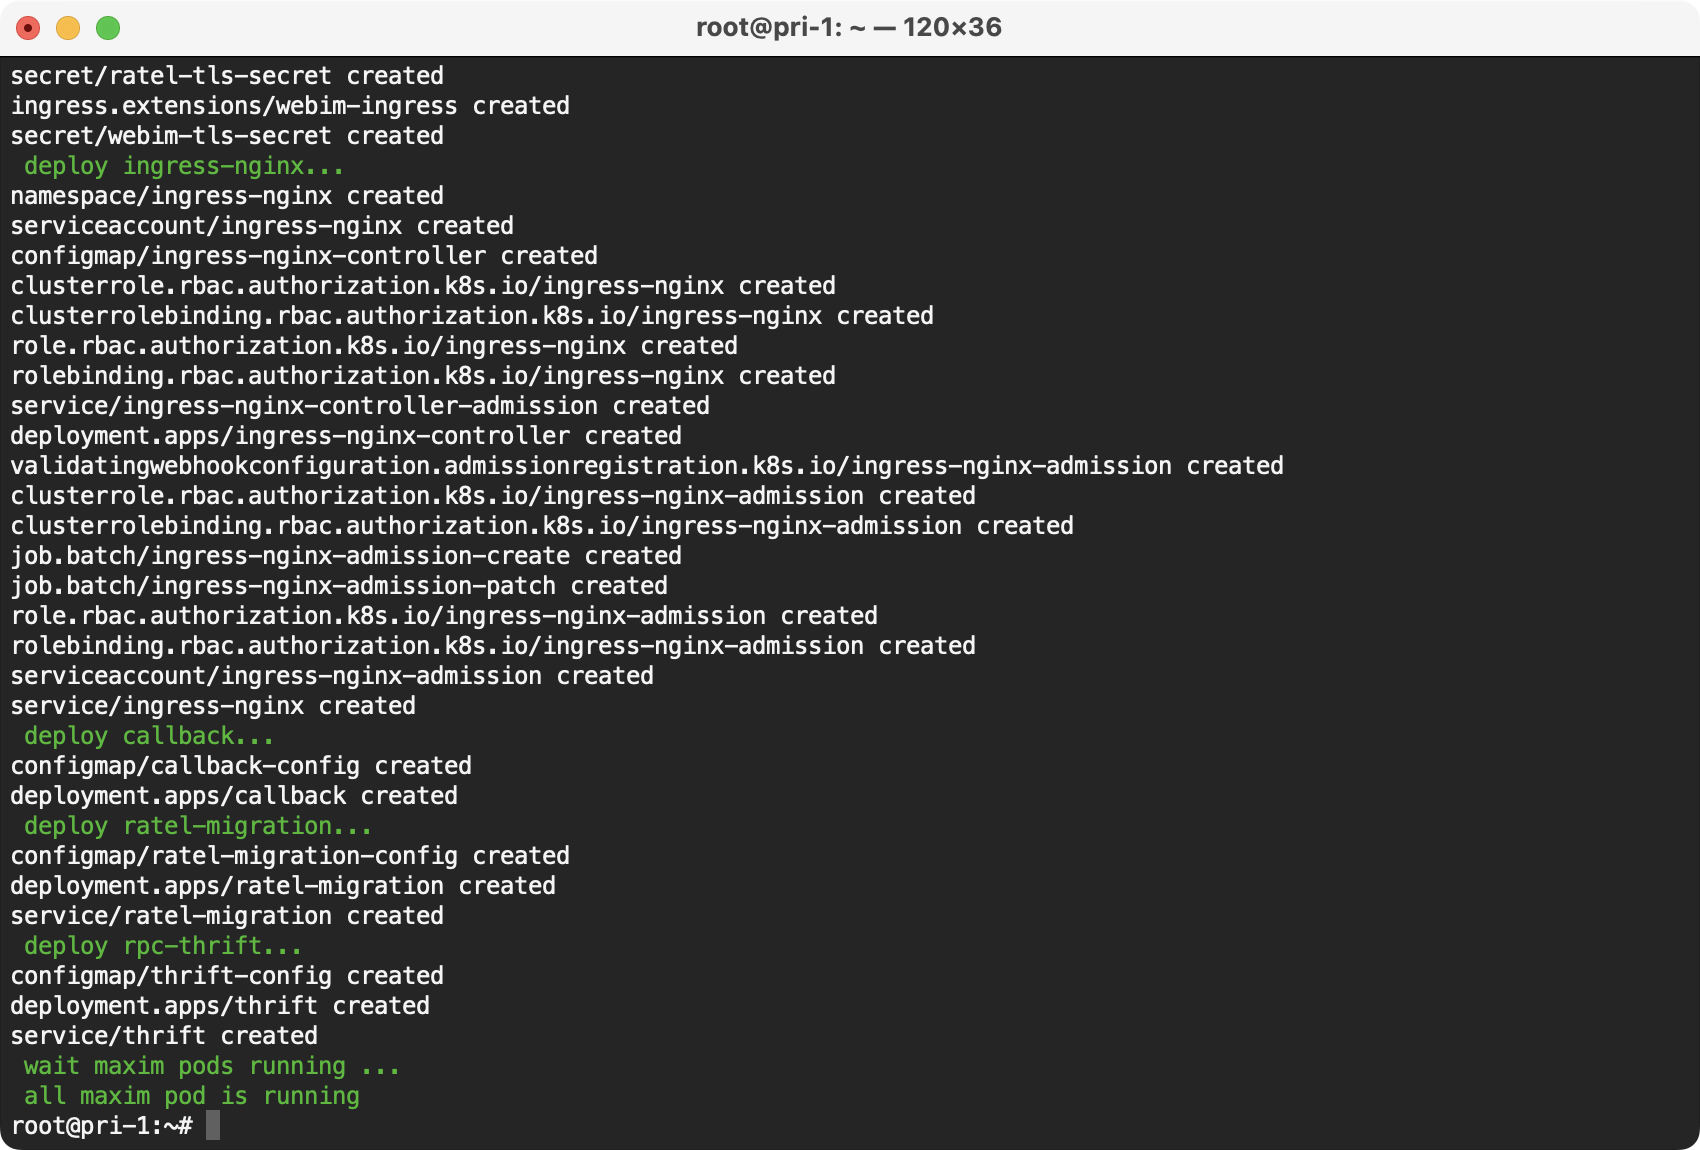
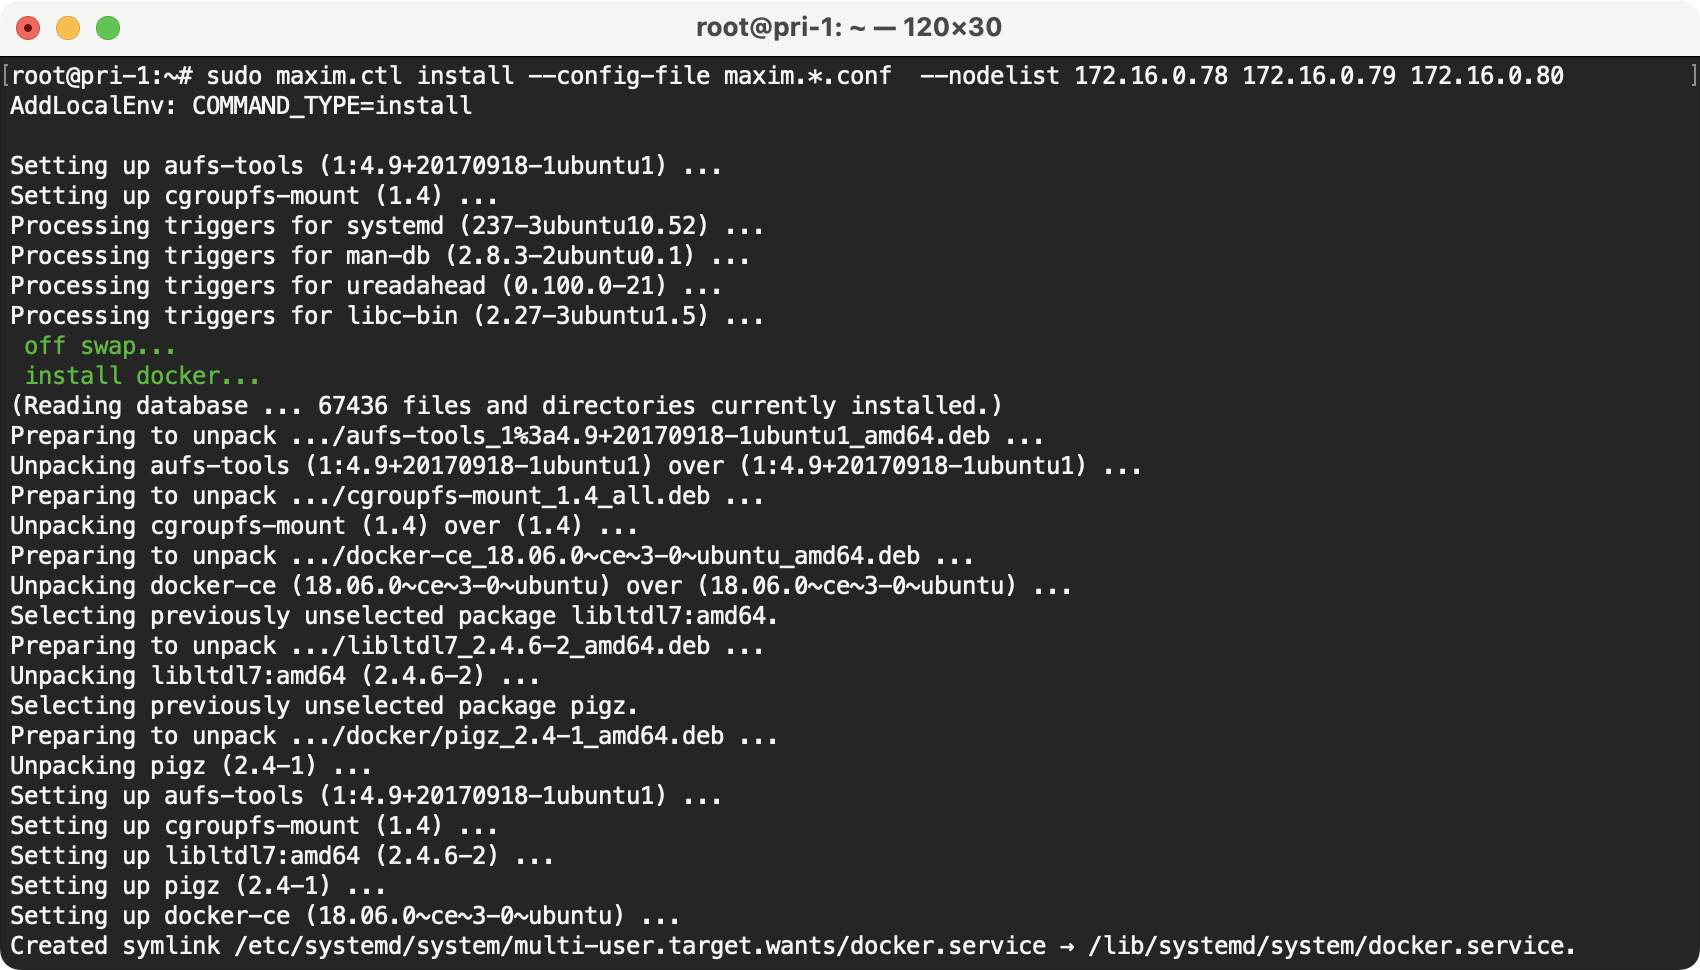
4.Run installation
sudo maxim.ctl install --config-file maxim.*.conf
Screenshot of execution started:
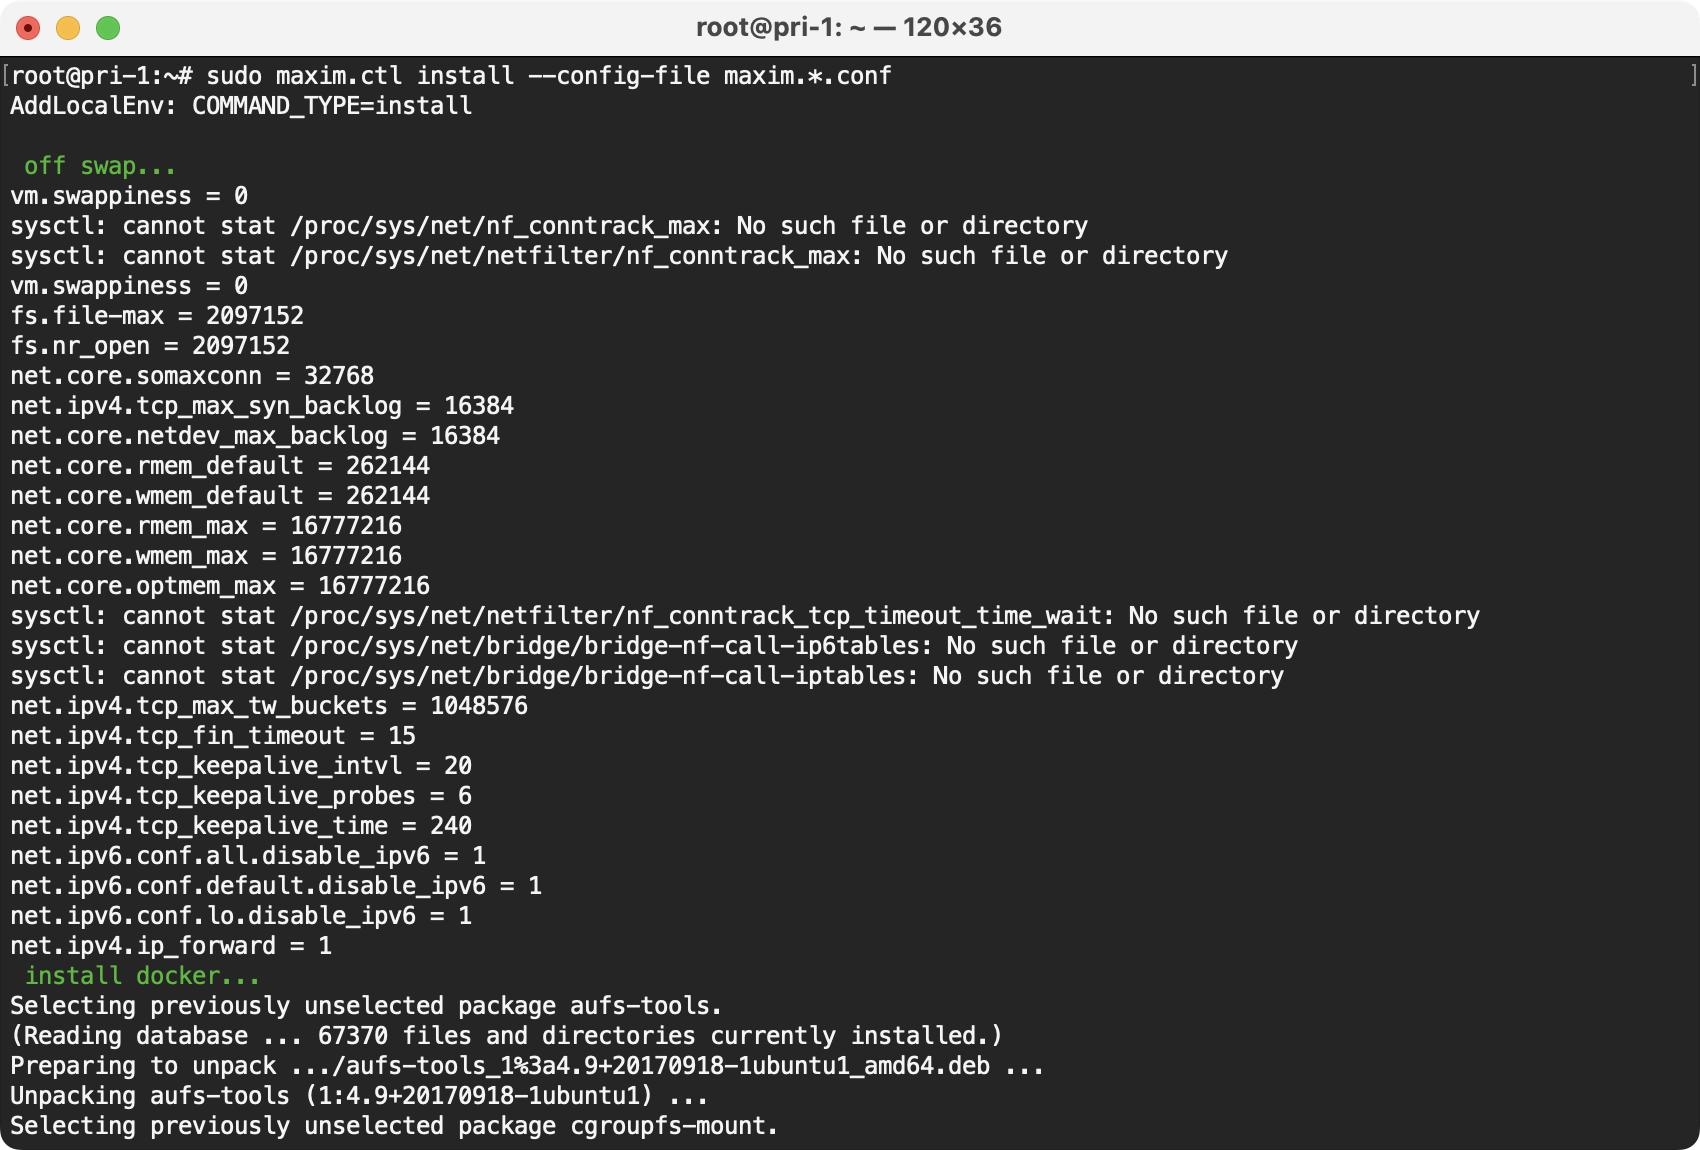
Screenshot of installation completed
Hint: Wait for the installation to complete, which takes about 15 minutes.
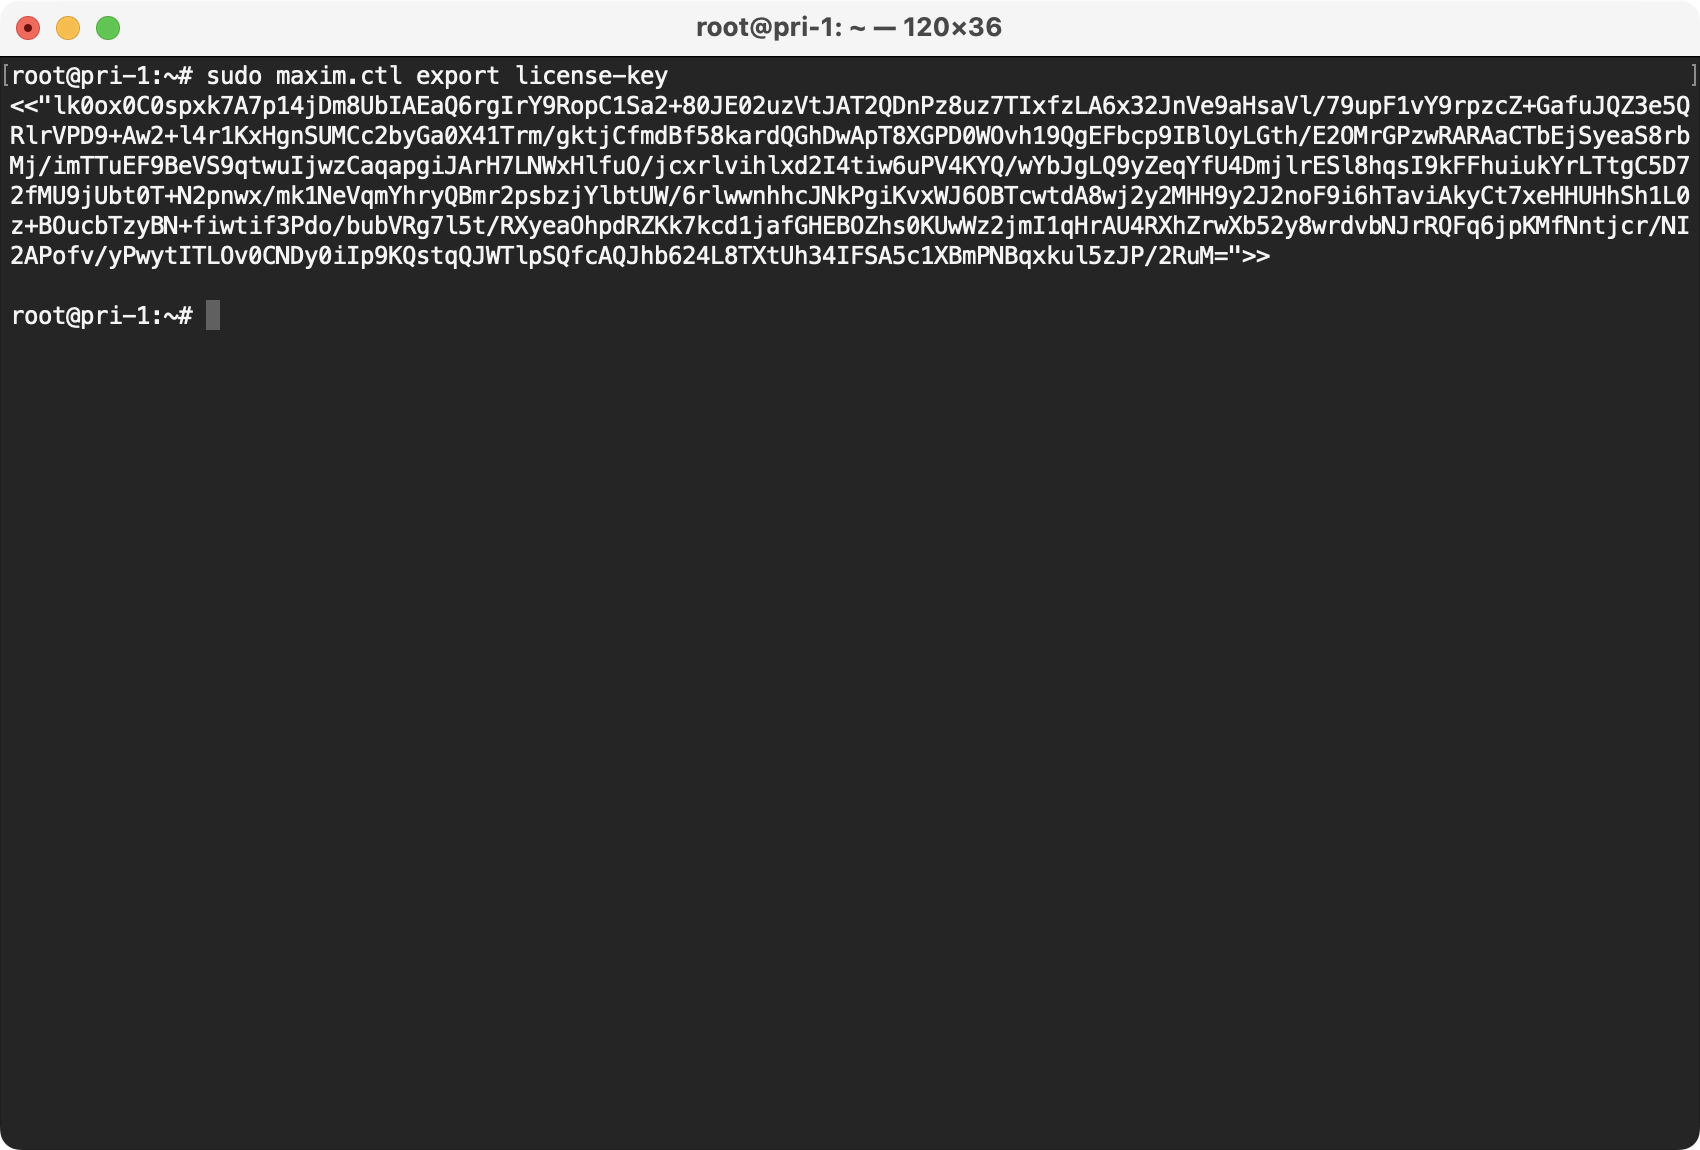
5.Generate Cluster LicenseKey
sudo maxim.ctl export license-key
Screenshot of the execution result:
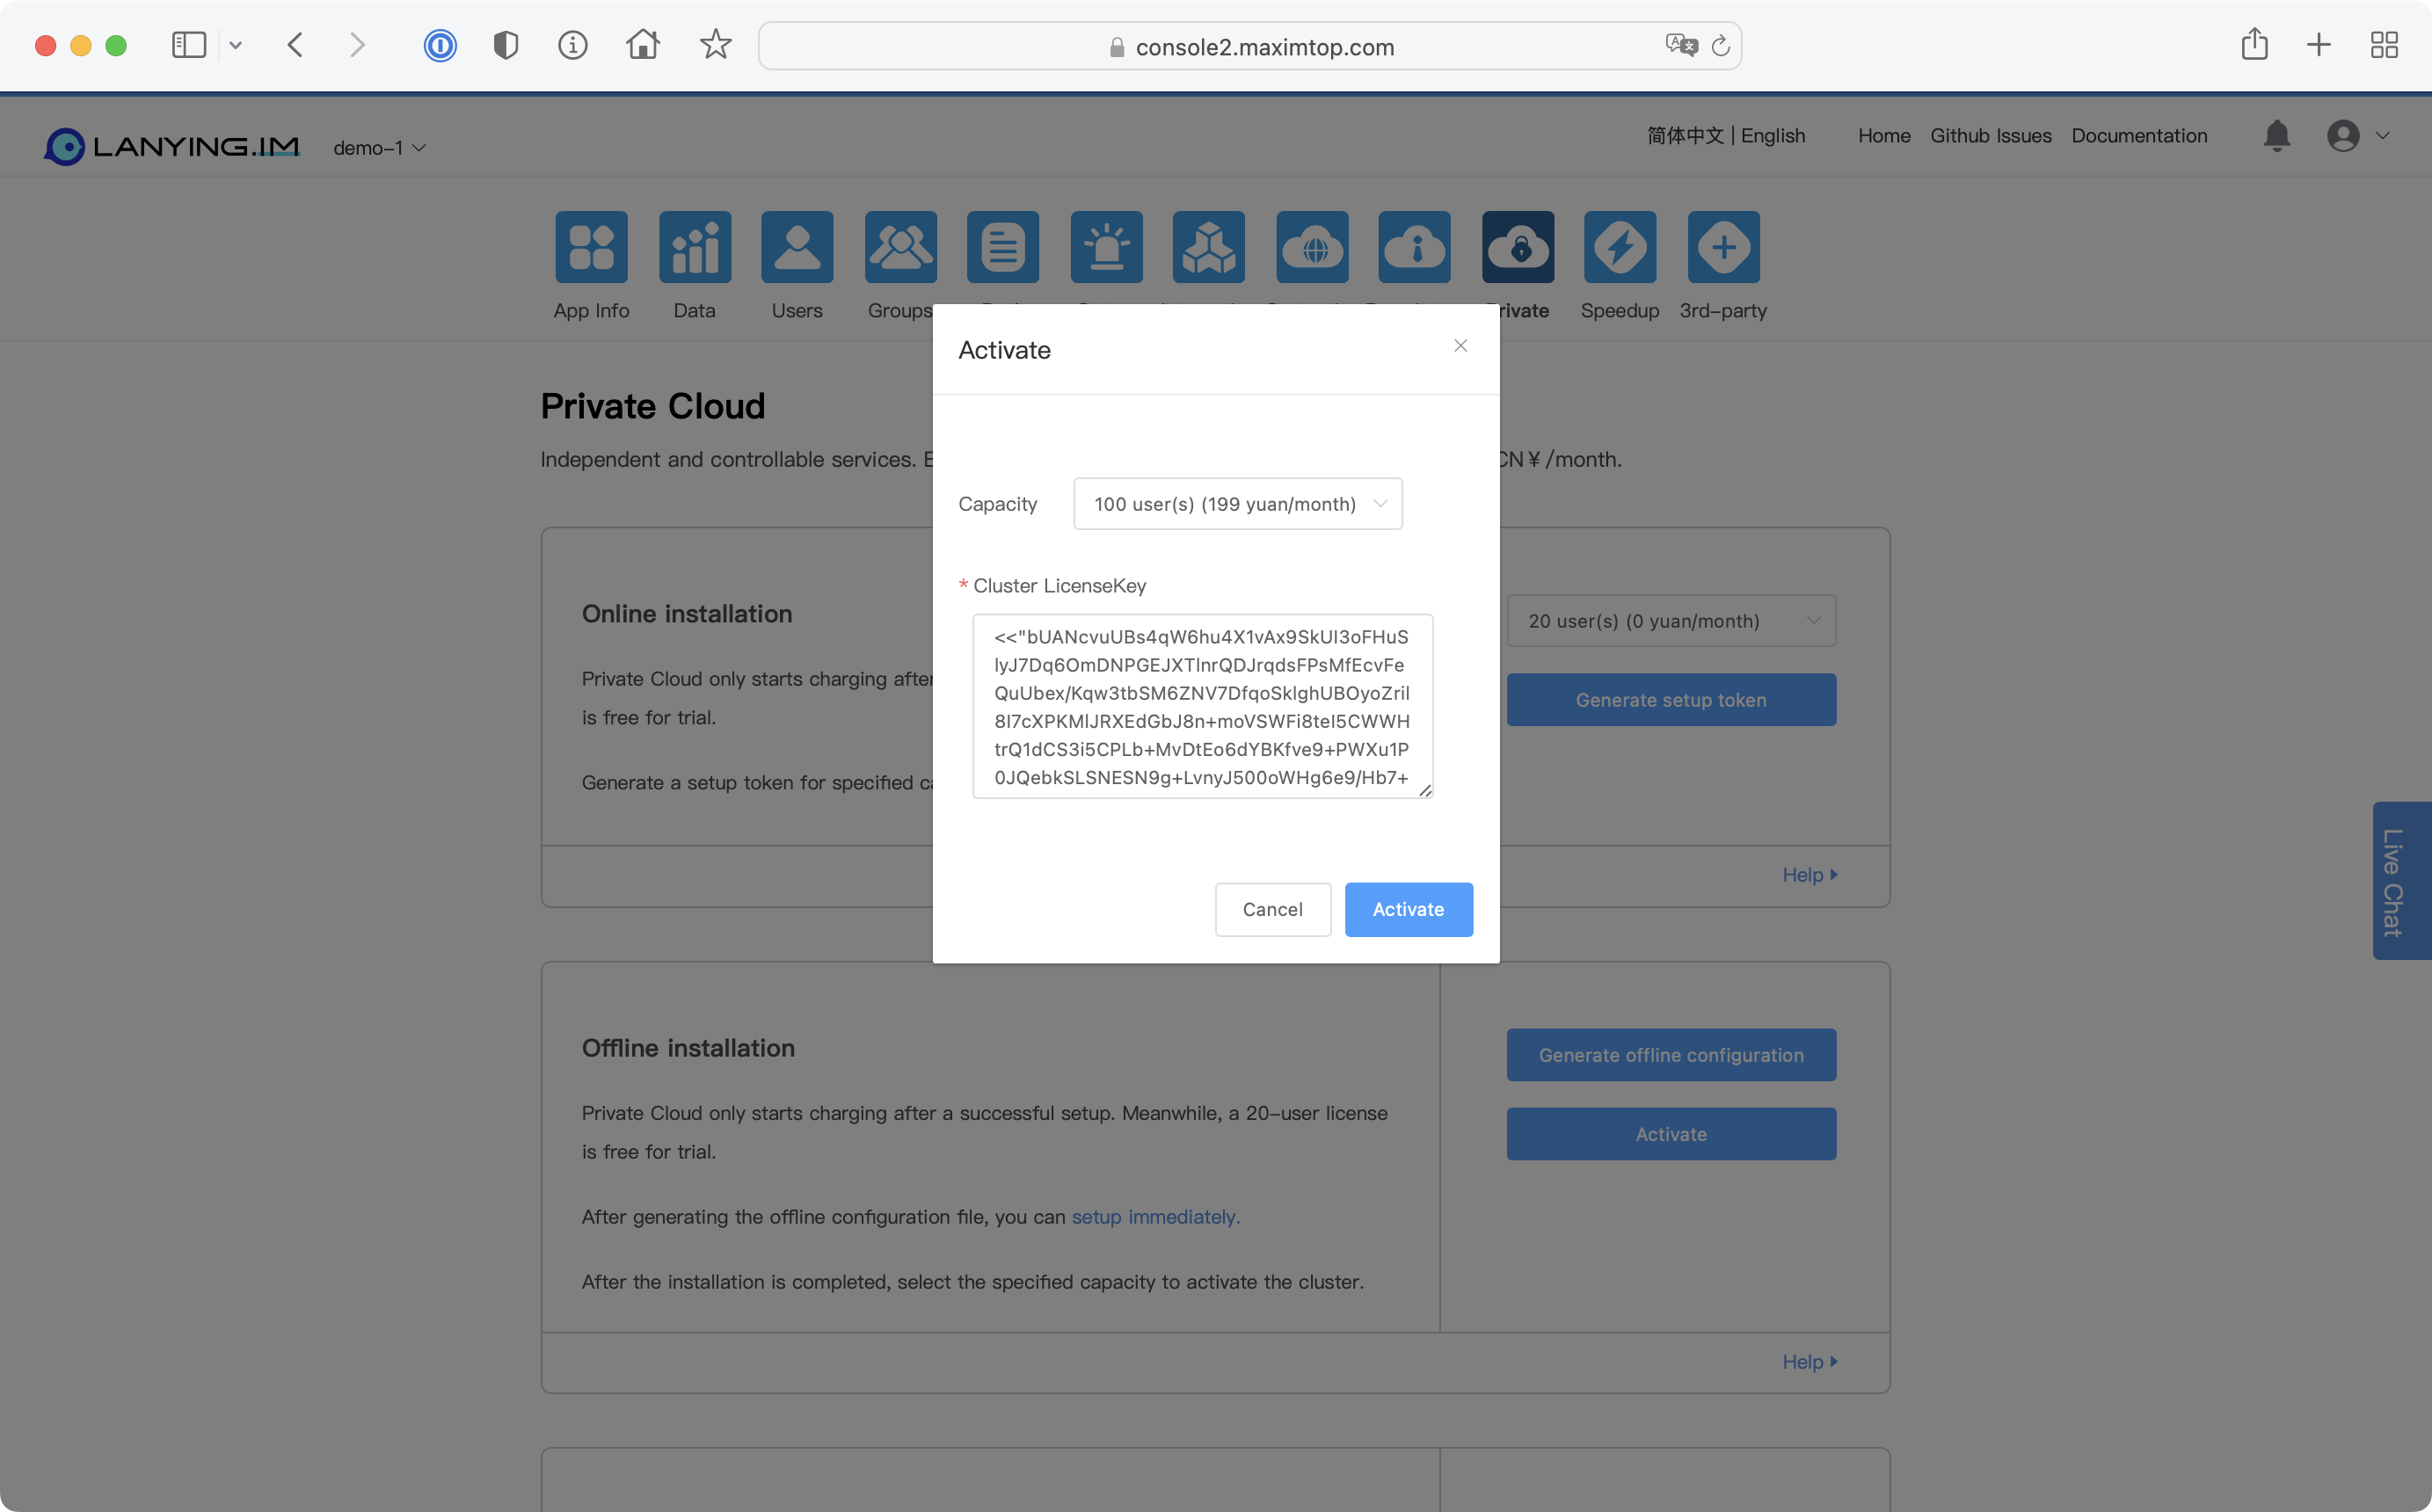
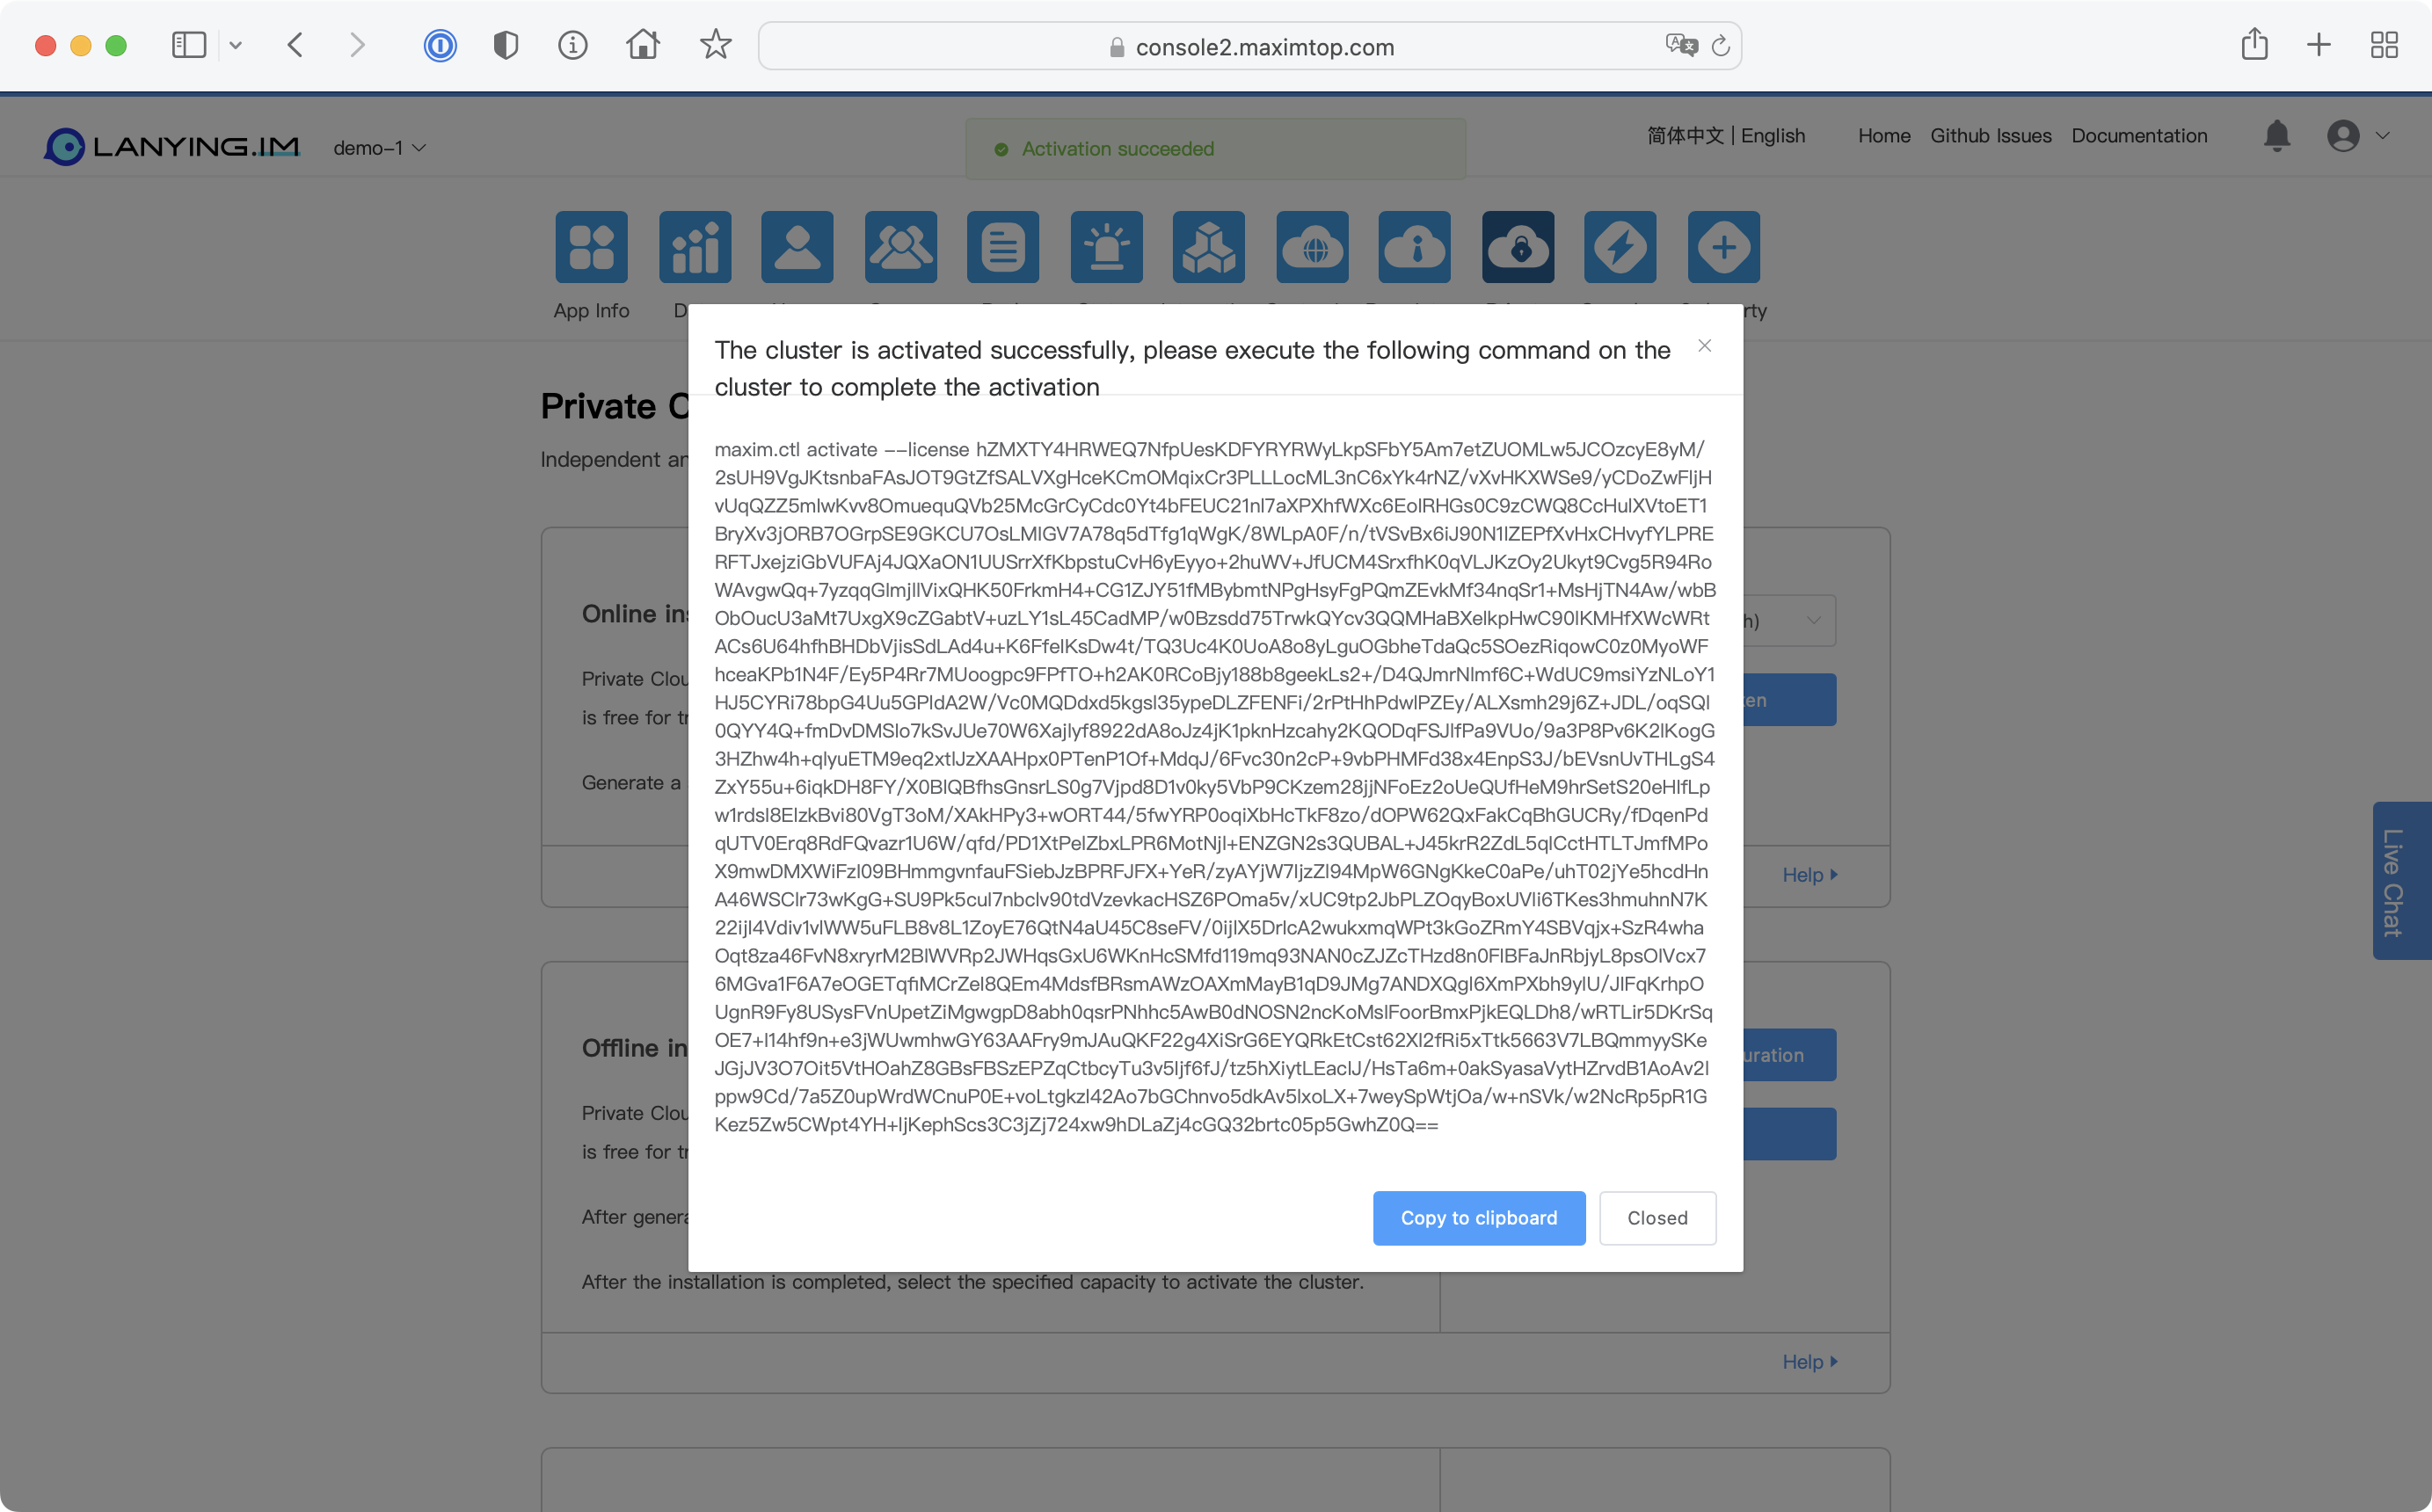
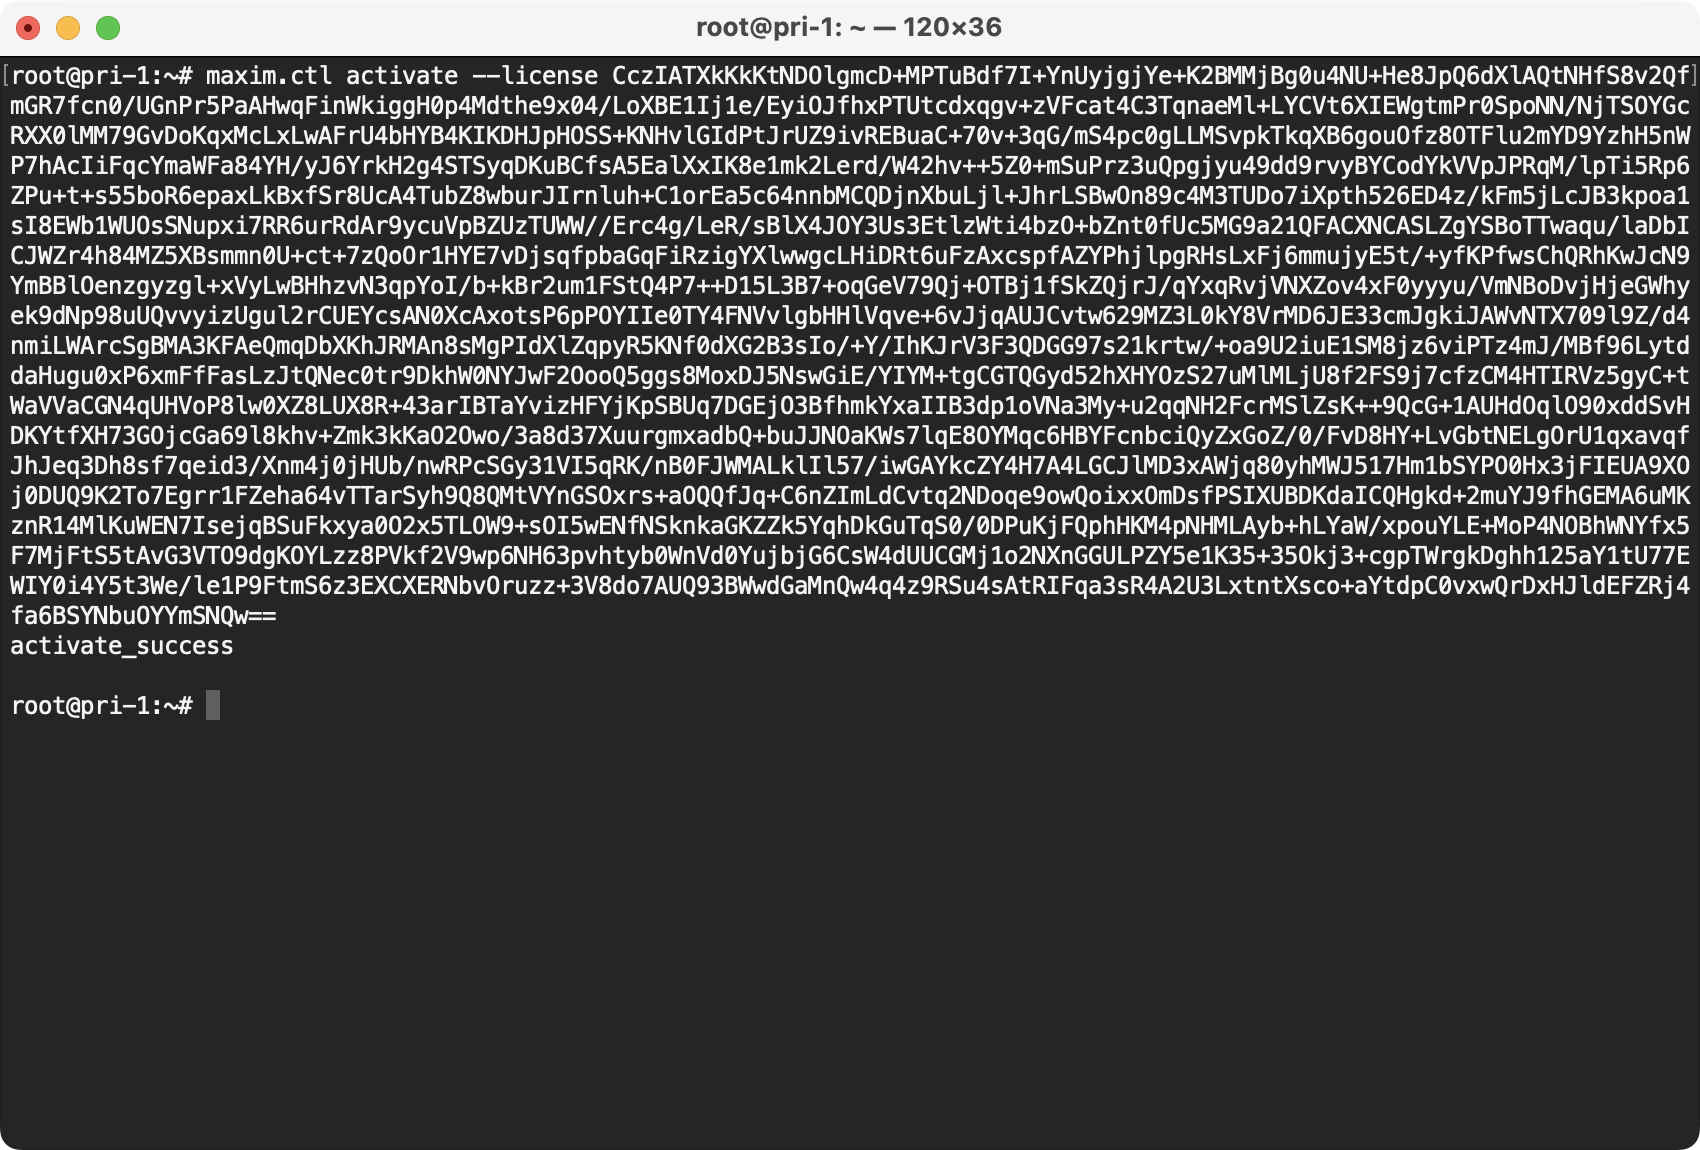
6.Activate the cluster
On the Private Cloud page of the Console, click Activate Cluster, in the pop-up dialog box, select the cluster capacity , enter the LicenseKey, click "Activate Cluster", and then execute the obtained activation command in the cluster
Screenshot of the operation:
7.After the activation is completed, perform steps 5 and 6 to update the license of the cluster every month, otherwise the cluster will prevent users from logging in because the license expires. If the configuration or administrator token is modified in the console, steps 5 and 6 also need to be performed to update the cluster.
Cluster version (Offline installation)
1.Configure cluster access
Configure the ssh permission of the first host to the remaining hosts, taking three hosts, 172.16.0.78, 172.16.0.79, 172.16.0.80 as examples.
ssh login master node (172.16.0.78)
Execute the following command to generate public and private key for ssh:
sudo ssh-keygen -t rsa -f ~/.ssh/id_rsa -P ''
Screenshot of execution result:
Execute the output of the following commands on hosts 172.16.0.78, 172.16.0.79, 172.16.0.80, respectively
sudo echo "sudo echo \"`cat ~/.ssh/id_rsa.pub`\" >> ~/.ssh/authorized_keys"
Screenshot of command output:
Execution result of the command output at 172.16.0.78:
Execution result of the command output at 172.16.0.79:
Execution result of the command output at 172.16.0.80:
2.Download Offline Installation Package, and upload it to the server for deployment.
3.Execute the following command to mount the offline installation package and add maxim.ctl to the executable path.
mkdir -p /lanying && mount -o loop lanying-im-server*.iso /lanying && cp /lanying/maxim.ctl /usr/bin/
Screenshot of execution result:
4.Generate offline configuration file
Login Console, select the APP, enter the Private Cloud page, generate an offline configuration file, and upload it to the server.
Screenshot of the operation:
5.Run the installation
sudo maxim.ctl install --config-file maxim.*.conf --nodelist 172.16.0.78 172.16.0.79 172.16.0.80
Screenshot of execution started:
Screenshot of installation completed

Tip: Wait for the installation to complete, it will take about 20 minutes to complete the installation.
6.Generate Cluster LicenseKeys
sudo maxim.ctl export license-key
Screenshot of the command:
7.Activate the cluster
On the Private Cloud page of the console, click Activate Cluster, in the pop-up dialog box, select the cluster capacity, enter the LicenseKey, click "Activate Cluster", and then execute the obtained activation command in the cluster
Screenshot of the operation:
8.After the activation is completed, perform steps 6 and 7 to update the license of the cluster every month, otherwise the cluster will prevent users from logging in because the license expires. If the configuration or administrator token is modified in the console, steps 6 and 7 also need to be performed to update the cluster.
Notes
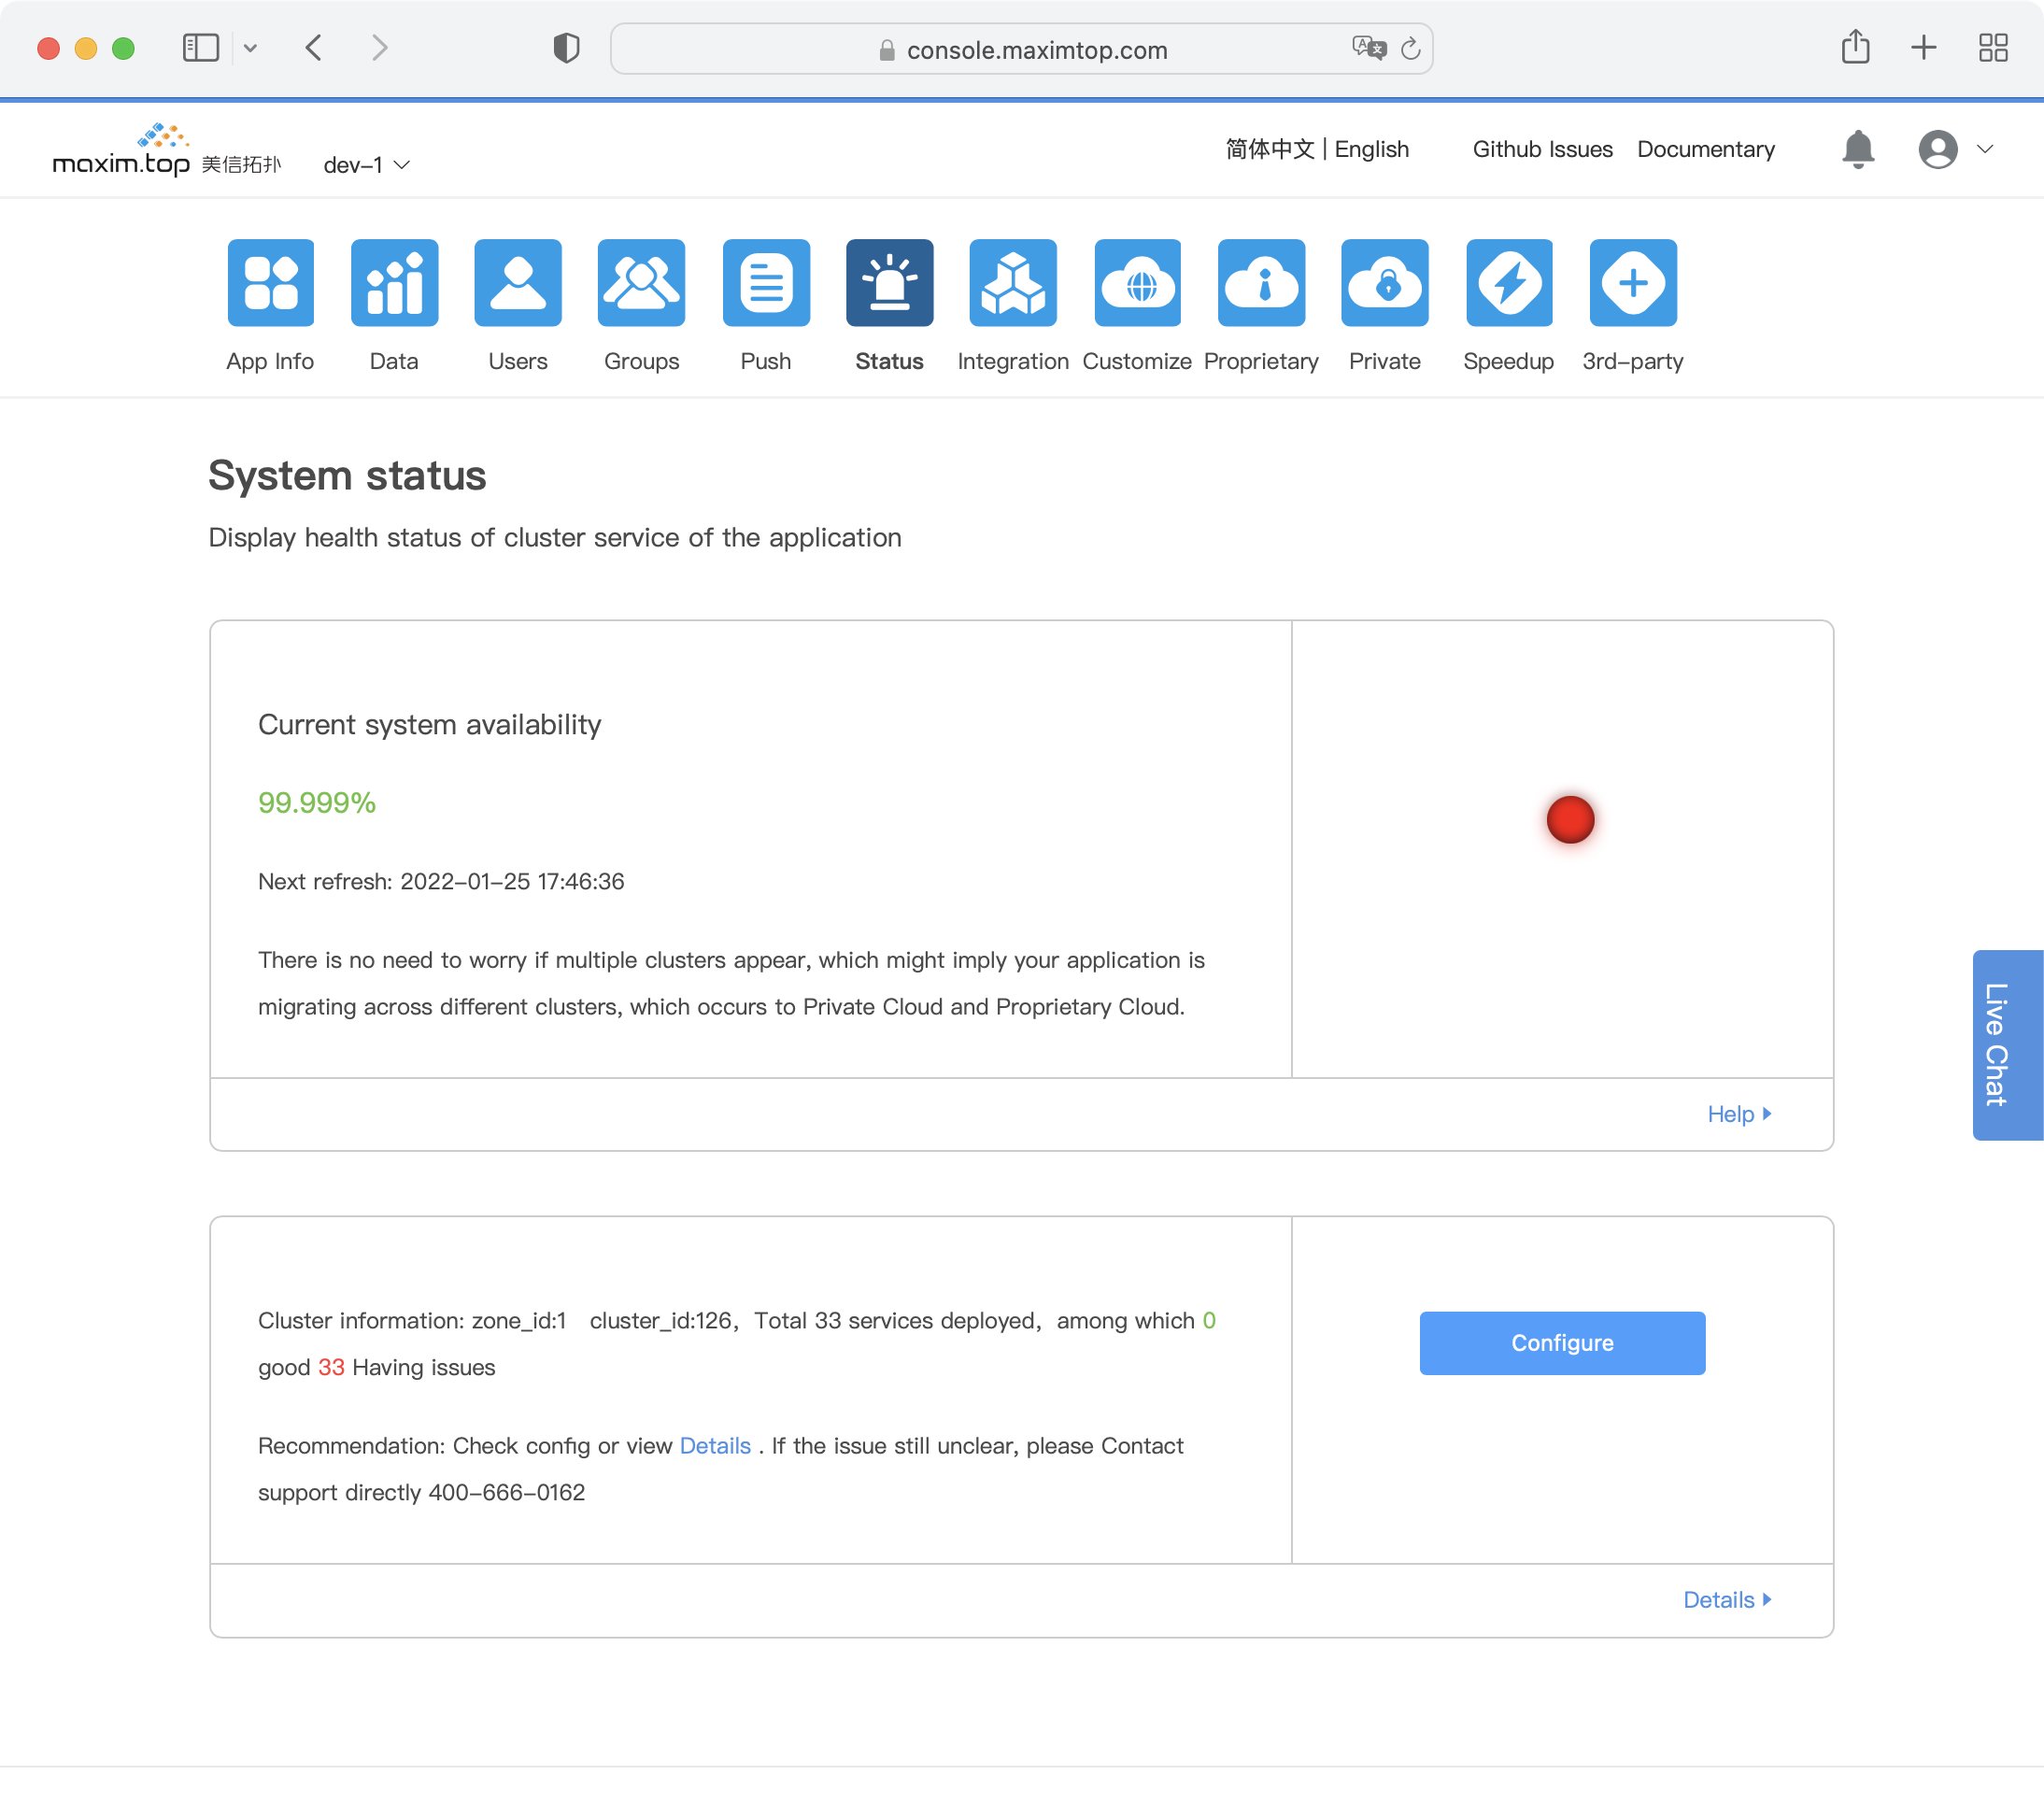
- After the service installation is complete, the console will automatically connect to the server to perform a status check. The check results can be viewed on the console’s system status page. If the check passes, migration will proceed automatically, and once migration is complete, the service can be used. If it is confirmed that the local environment cannot be accessed externally, the parameter --net internal needs to be added during installation to prompt the installer to select an intranet IP for registration.
- If the host has a firewall, you need to ensure that ports 443 and 80 are accessible.
- How to check Private Cloud installation progress and data migration status?
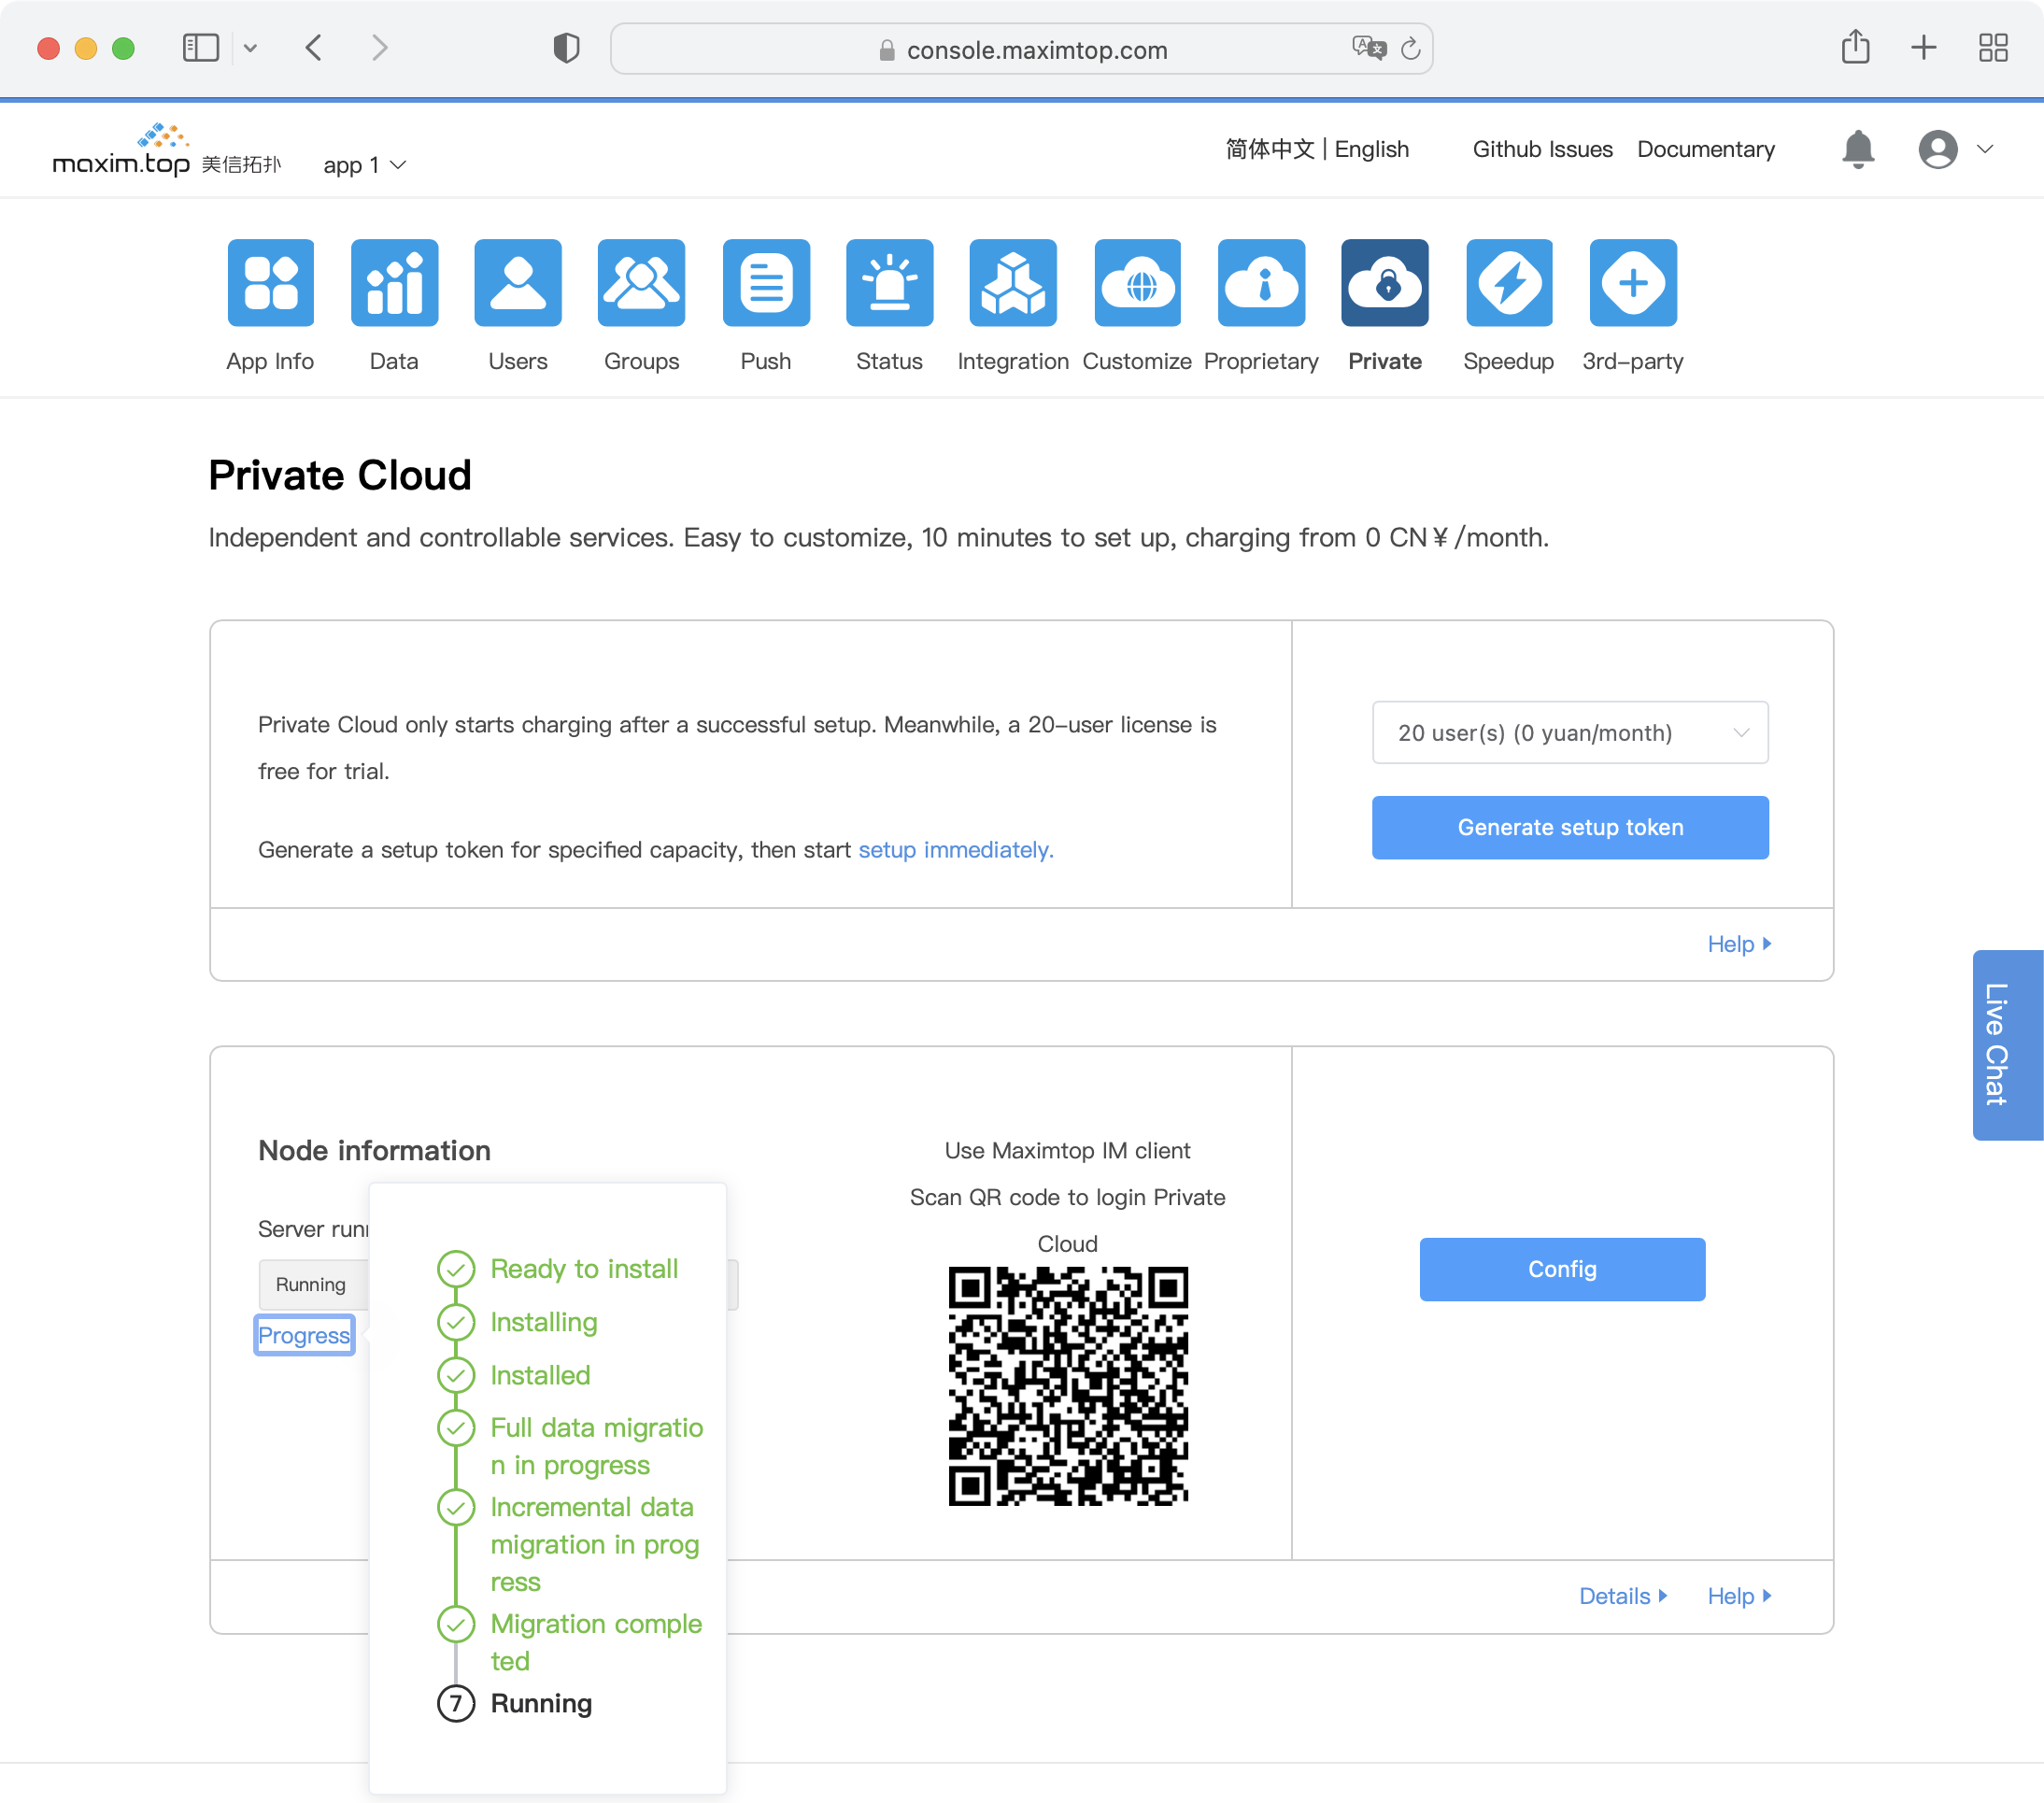
- After installation completed, open Lanying IM Console to enter System Status page.